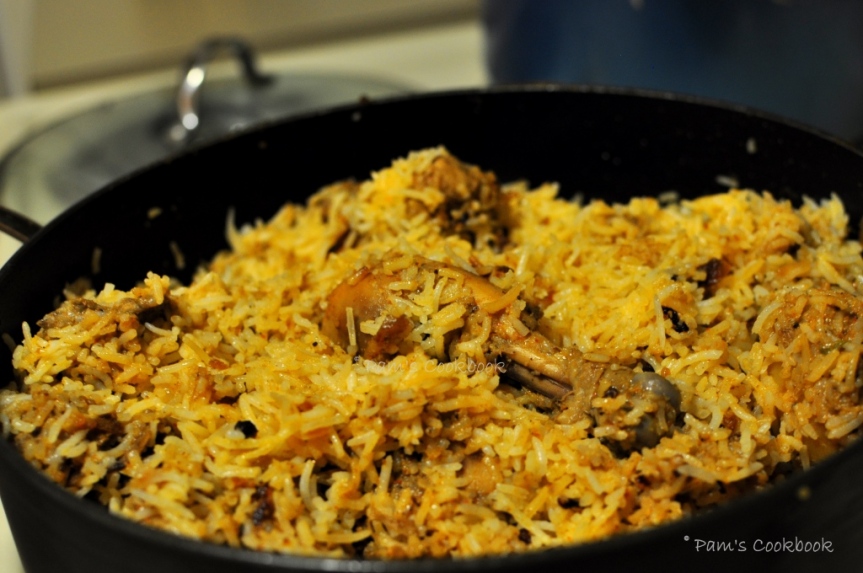
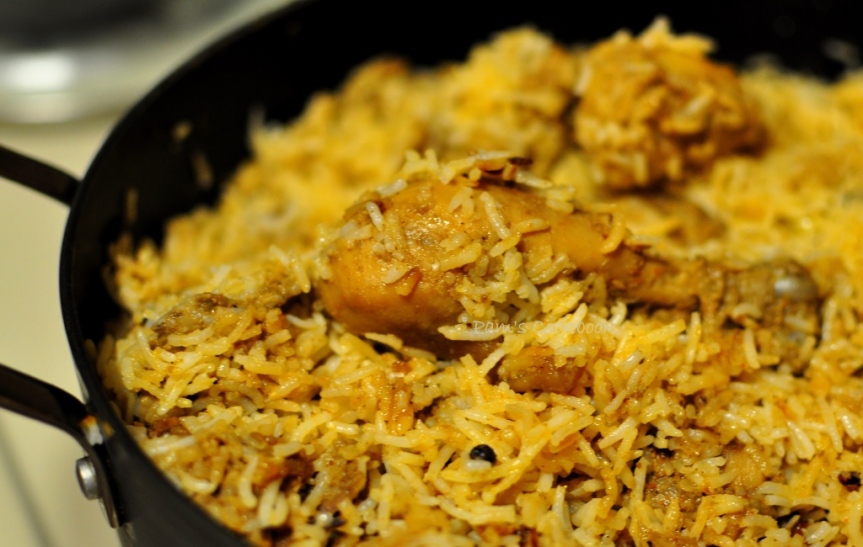
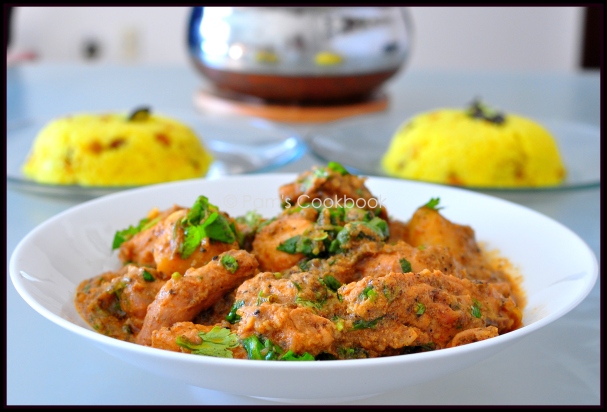
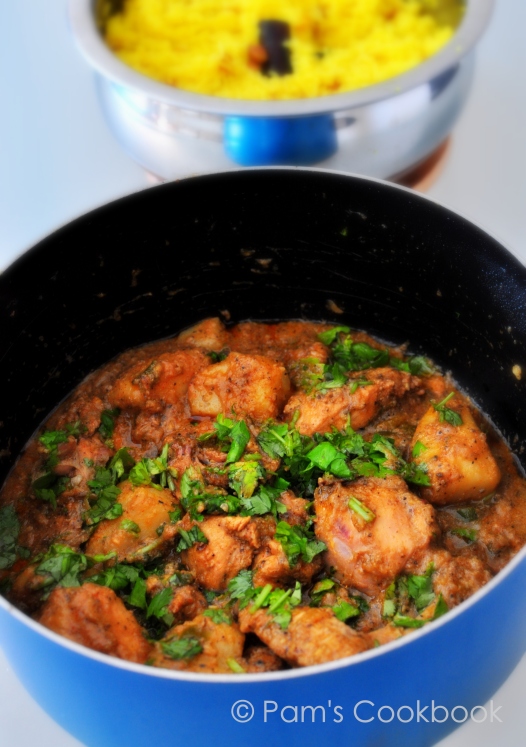
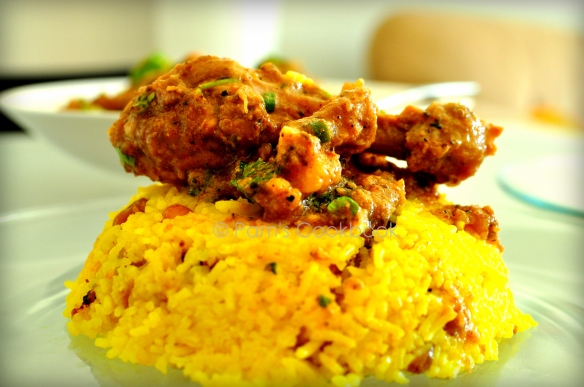
Chicken Dum Biryani

DSC_0138

This post is specially for my brother who is trying his hand in cooking for the last couple of months. And every time I call up I find him cooking chicken. Earlier I would have been impressed but as they say “I ain’t dumb no longer”. (Sorry Bro, its my blog and I get to say whatever I feel like.) Basically the point I am trying to make is that chicken is probably one of the easiest and a no-fail thing to cook. All the basic ingredients with some twist here and there and it always comes out good. So I was thinking maybe he was taking the easy way out. And then he surprises me by making some authentic Bengali fish preparations that even I have never tried. And that knocked me down… well at least the pics did! So I told him to try something from my blog … what kind of a food blogger would I be if my own brother does not refer to it once in a while. On his request of Chicken Dum Biryani recipe here comes today’s post.

I already have a post on chicken biryani (Pakki) (see here), but that was a long time back when I had first started cooking, clicking and blogging. Since then I feel I have come a long way and hence the need for a newer version of the recipe was in my mind for a long time. More so because now I know that there is no one right method of making biryani. Wikipedia shows an impressive list of the types biryani (see here), but that is a little too overwhelming for me. For now I will stick to the types I have tried.

Kachchi Biryani – Here the raw chicken, marinated with spices is cooked with parboiled rice on Dum (sealed air tight condition) over low heat. You could either do this on stove top or in the oven.

Pakki Biryani – Here the chicken and rice both are cooked to 90% and then layered and cooked on Dum (sealed air tight condition) over low heat. You could either do this on stove top or in the oven.

Irrespective of which method you decide to cook the ingredients remain the same. This recipe is the kachchi biryani style.

DSC_0128

Ingredients: Chicken to rice ratio is usually 2:1. Whole /freshly ground spices are preferrable, but most of the times I end up using the store bought Shan’s Biryani Masala and whole cardamom, cinnamon and cloves.

For Chicken:

  • Chicken 1 kg
  • Yogurt – 3/4 cup
  • Ginger paste – 1 tbsp
  • Garlic paste – 1 tbsp
  • Green chillies, chopped – 7-8 or to taste
  • Onions, thinly sliced – 2 large onions
  • Whole peppercorns – 4-6
  • Shah Jeera/Caraway seeds – 1/2 tsp
  • Coriander powder – 1 tbsp
  • Red chilli powder – 1 tsp or to taste (adjust with the proportion of green chillies added)
  • Whole garam masala / spices
    • Green cardamom – 3-4
    • Black cardamom – 1
    • Cinnamon sticks – 2 one inch sticks
    • Cloves – 6
    • Nutmeg (Jayfal) – 1
    • Mace (Javitri) – 2-3 (depending on the size)
  • Lemon juice – 1 lemon
  • Oil / Ghee / Clarified Butter – 3-4 tbsp + as required for frying onions
  • Coriander leaves, chopped (Save some for assembling) – 1/2 cup (I usually skip this)
  • Mint / Pudina leaves, chopped (Save some for assembling) – 1/2 cup (I usually skip this)
  • Salt – to taste

For Rice:

  • Long grain Basmati Rice – 500 gms
  • Bay leaf – 1
  • Whole Garam Masala:
    • Green cardamom – 2
    • Cinnamon sticks – 1 inch stick
    • Cloves – 2
  • Whole peppercorns – 2-3
  • Shah Jeera/Caraway seeds – 1 tsp
  • Salt – to taste
  • Oil / Ghee / Clarified Butter – 1 tbsp
  • Water – as required

You can also use Mace and Nutmeg along with the whole spices, but I usually skip that.

For assembling the Biryani:

  • Onions, thinly sliced – 2 large
  • Potatoes – 3 medium sized
  • Oil / Ghee / Clarified Butter – as required for frying onions and for assembly.
  • Food color (optional) – I always skip this.
  • Saffron soaked milk (optional) – 1 tsp saffron added to 1/2 cup. I usually skip this.

For Dum: Chapati dough or foil paper

DSC_0134

Method:

Stove-top method:

  • Heat a pan with sufficient oil and fry the thinly sliced onions till they are nice brown in color. Take care not to burn them. You can fry all the onions (mentioned for chicken and assembling) together and then divide them into equal halves, one for marinating chicken and one for the assembly.
  • Cut the peeled potatoes in halves and sprinkle some salt and garam masala. Lightly fry them till it gets a light golden color. Drain and keep it aside. These will be cooked completely along with the biryani.
  • Grind the spices mentioned for chicken – Green & Black Cardamom, Cinnamon, Cloves, Mace, Nutmeg, Shah Jeera, Peppercorns.
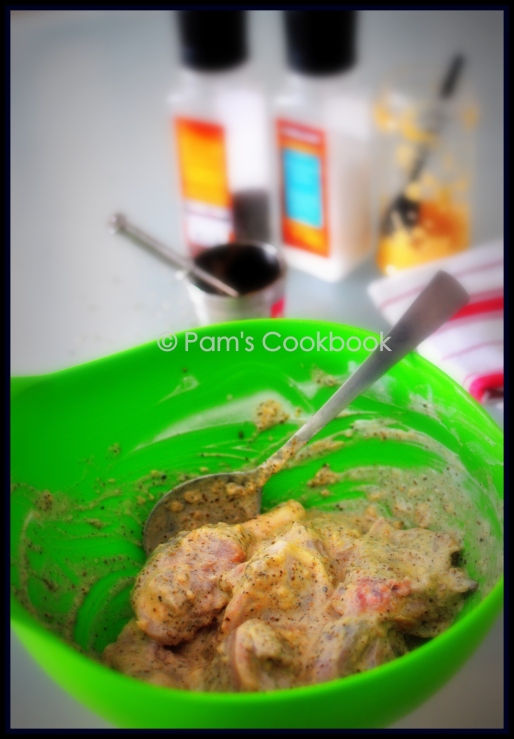
  • Marinate the chicken with all the ingredients mentioned for chicken and keep it in the refrigerator for 2-3 hours or more.
  • Wash and soak the rice in sufficient water for atleast 30 minutes before cooking.
  • In a big pan add sufficient water (for cooking rice) and put on boil.
  • Take a clean cotton cloth and a put the spices mentioned for rice (Whole Garam Masala, pepper corns, Mace & Nutmeg,  if using ) and tie it to make a small bundle. I usually add the whole spices directly to water. However if done this way you will get the flavor of the spices and can remove it if you don’t like to bite into the whole spices.
  • Add the bay leaf and the spice bundle along with salt and oil into the boiling water.
  • Next add the drained rice to the water and give it a light mix. Let it come to a boil. Once the rice has come to one full boil it will be 50% cooked. Turn off the stove and drain the parboiled rice. At this stage you can remove the bundle of spices. Do not throw away the drained water from the cooked rice as we will be using a portion of it later.
  • Take a heavy bottom pan for assembling the biryani, put it on high heat and add 1-2 tbsp of oil or ghee to it.
  • Add the chicken with its marination to the pan, spread evenly and let it fry on high for a couple of minutes, then lower the flame to medium.
  • Add the fried potatoes.
  • Layer half of the parboiled rice on top of the chicken layer and spread evenly.
  • Sprinkle some of the fried onions saved for assembly (from step 1) and a few drops of ghee.
  • Add little (maybe 1/8th cup) of the drained water (from cooking rice) to it. If using saffron milk add it in place of the water.
  • Add the remaining rice and spread evenly.
  • Top it with the remaining fried onions, a couple of drops of ghee, chopped coriander and mint  leaves saved for garnishing.
  • Again add little (approx. 1/8th cup) of the drained water (from cooking rice) to it. If using saffron milk add it in place of the water.
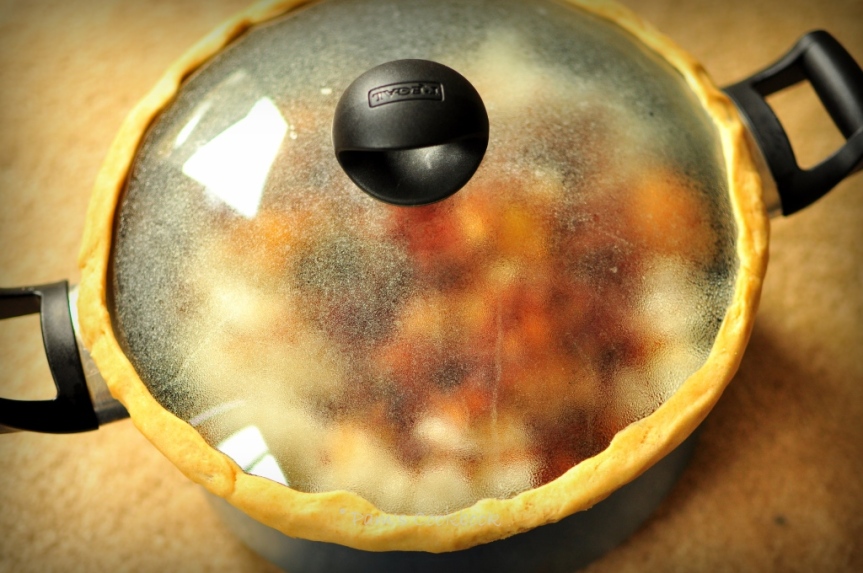
  • Place the lid of the pan and seal it with the chapati dough. Alternatively. Seal the pan with a foil paper and then place the lid over it. The chapati dough works better.
  • Lower the flame to low and let it cook for 45 minutes approx. Then turn off the flame and let it rest for 15-20 minutes.
  • Remove the hardened dough with a knife and carefully open the lid.
  • Check if the rice is tender. Gently insert a spatula or a wooden flat ladle at the edge of the vessel and lift up the chicken from the bottom of the pan. Do it along the edges of the pan to lightly mix the biryani. Do not over mix the whole thing.
  • One way of checking the doneness of the biryani is by checking the potatoes. Usually everything will be well cooked by now. If for some reasons it is still not done, place a flat heavy bottomed non-stick pan on heat, once hot, lower the flame and place the biryani pan on top of it, cover it with the lid and let it cook for another couple of minutes.
  • Serve it with raita and salad.

Oven method:

To cook the biryani in oven, assemble the whole thing as described above in an oven proof pan. Cover it tightly with a foil. Cook it for 45 – 50 minutes in a preheated oven at 350F. Once done, mix gently.

Note: The process may appear to be a little overwhelming but as with all kinds of cooking, repeated practicing is the only way to go. The process was a little lengthy to write down and I was getting lost in between, so dear readers, I apologise for any vagueness or confusion. Do get back to me if you think I need to explain it better.

The pics were taken a while back and am using it for this post.

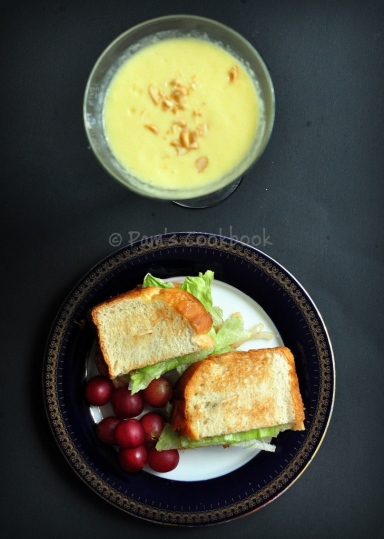
Chicken Slice Sandwich

Chicken Sandwich compressed

I am out  of town accompanying my husband on his office trip. We will be returning home today so we decided to check out and I am waiting for him to pick me up at the Destiny USA / Carousel Mall in Syracuse, NY. Already done with the window shopping and now lunching at the Panera Bread with a Napa Almond Chicken Sandwich and plenty of time to kill. No I am not shopping anything for myself, however hard that might be to believe, I am not. We both had been buying stuff a little extravagantly last couple of days telling each other its our Puja shopping but seriously who are we kidding!!!

Anyways my Panera Sandwich reminds me of  the post that has been lying in my drafts waiting to be edited and submitted, so I decide to do this right away. No stories today.. no pouring out emotions. Just a quick post on an equally quick recipe. Actually no recipe at all its mainly assembling that needs to  be done. On those days when you wanna grab something for a light lunch or dinner without any elaborate preparations/cooking/cleaning – a sandwich can always come to your rescue.

DSC_0328compressed

I made this last week and used whatever was available in my fridge. There can be number of alterations / additions to this, so do it your way and make it your signature dish.

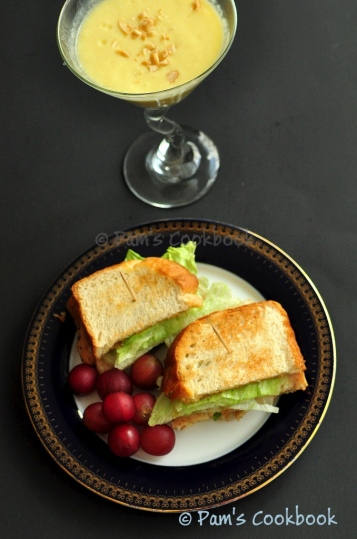
The first picture has been edited by my loving husband… he wanted to give it a feel of a restaurant style menu. I loved it and decided to use it as my landing pic for this post.

Ingredients: As required for one sandwich

  • Bread – 2 slices; I used white bread, but you can use any variety of your preference.
  • Tomato slices – 2 small slices or one big slice
  • Lettuce – 1 leaf, washed, dried and folded.
  • Onions – 2 rounds or slices
  • Chicken Slice – 3-4. I used the this variety from Target – Hormel Natural Choice Sliced Rotisserie Style Deli Chicken Breast. It is cooked and needs minimum preparation. Use any type of chicken / meat you want.
  • Any sauce/dressing of your choice – as required. I use either a dash of hot sauce, honey mustard or lemon dill
  • Butter or spread for the toast – I like using the Irish butter that is available in BJs.
  • Oil / butter.
  • Any seasoning of your choice – Salt and Pepper (for sure), sometimes I also add a little of the Cajun spice.

Method:

  • Heat a pan on high heat with very little oil/butter. I use the spray oil can for this purpose.
  • Add the onion rings/slices and the chicken slices.
  • Sprinkle some seasoning and saute on both the sides for a minute or two. This adds flavor to the chicken.
  • Meanwhile toast the bread and coat it lightly on one side with butter / spread.
  • Assembly: Place the tomato slices on the butter side of one of the bread slice. Top it with the lettuce leaf. Then add the sauteed chicken slices along with the sauteed onions. Add sauce of your choice. Top it with the remaining slice of bread, buttered side down.
  • Press the sandwich a bit and slice it in halves. Secure it with a toothpick (optional).

Serve it as a lunch, brunch or even dinner. This time I added some grapes and a mango smoothie to make it a complete lunch meal.

DSC_0330 - Compressed

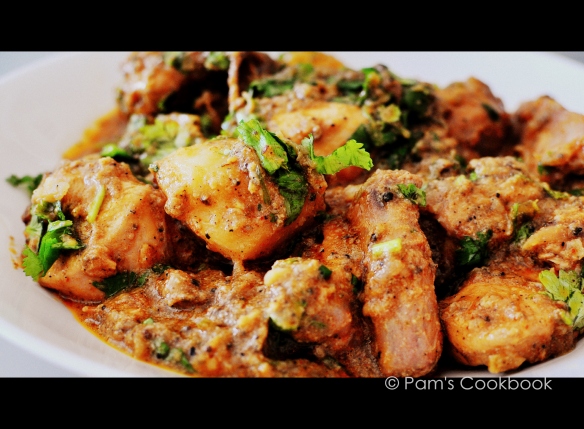
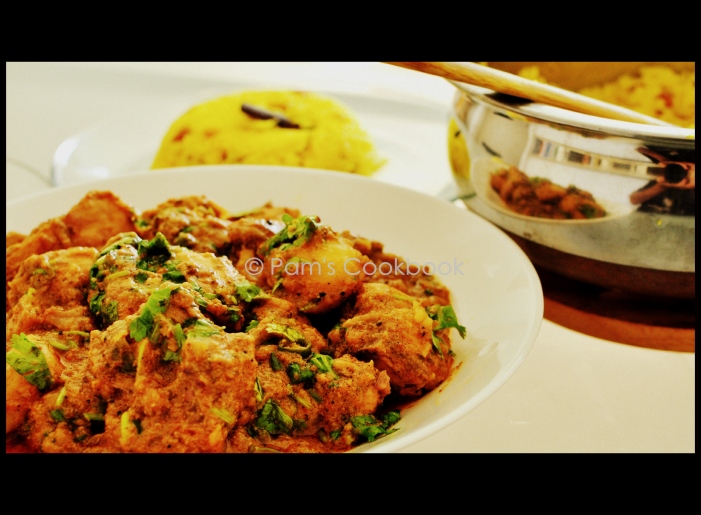
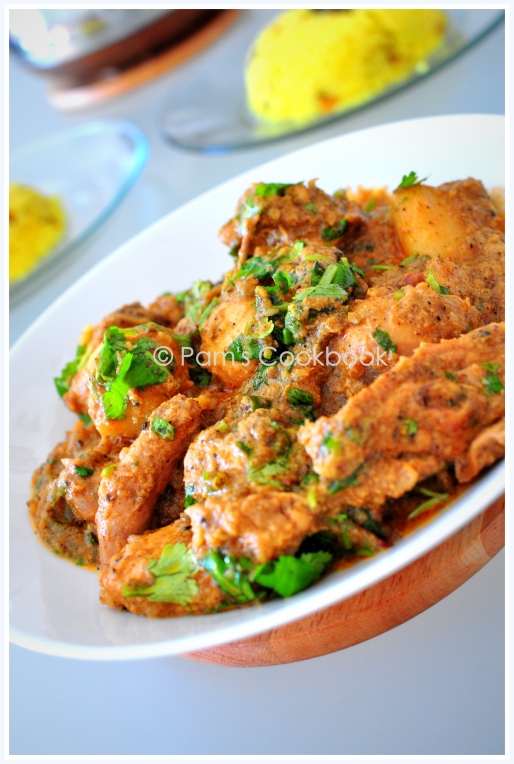
Chicken with Fennel – Mouri Murgi

DSC_0018

This post goes out to my friend ‘Appy’. I should have posted this a long time ago, but I just never got to click the pics. Usually on weekdays I cook regular stuff for lunch and anything ‘good’ for dinner. And I like to click mostly in daylight, the lighting in my kitchen is not that great so evenings don’t work for me. Weekends are, therefore, the best time when I cook elaborate meals for lunch and have the perfect light for the shots. The only problem is that I never seem to get much time for the shots as we both are eager to devour the food rather than wait for the perfect shots. So most of the times I have to be satisfied with the ‘not-so-good’ clicks and try to make it up with post-processing.

DSC_0043

Appy gave me this recipe a long time ago and since then I have made it innumerable times and served it with parathas or various rice preparations. And every time I have sent a short note of thanks (silently) for this wonderful recipe that we have come to love so much.  If I remember correctly she had told me this was originally a recipe for mutton. Since we hardly buy mutton and its mostly chicken for us, I never tried out the mutton version of this, but if anyone out there tries it out do let me know how it turns out to be.

DSC_0032

Now, I must tell you about this friend of mine, as this post is actually her recipe. When I ventured into the world of cooking she played a very significant role in inspiring me. I have gathered so many recipes and tips for cooking from her kitchen. We have shared so many discussions about cooking and kitchen + home management. I had also envisioned us cooking together like Hetal and Anuja from Showmethecurry – hah..! Guess that will have to wait for some other time – maybe – when we both stay close by and that does not seem very likely to happen anytime soon. Till then I am very happy with my blog and that I get a chance to compile all the recipes which I can pass on to someone someday….

DSC_0033

I was not sure what name to give to this recipe, so I just named it the first thing that came to my  mind. But feel free to suggest some good name for it, if anyone can. Also since we Bongs love to have aloo/potato with chicken I often add it. It up to you, go ahead and add some potatoes if you want it, or skip it if you don’t.

DSC_0014

Hope you try this recipe and like it. Look forward to your feedback and suggestions.

Bon Apetit!

DSC_0002

Ingredients:

  • Chicken – 600 gms (approx). I used half of a whole chicken
  • Fennel seeds – 1 tbsp
  • Black Peppercorns – 1 tbsp
  • Yogurt, well beaten – 1/2 cup
  • Ginger paste – 1 tbsp
  • Garlic paste – 1 tbsp
  • Onions, thinly sliced – 1 large or 2 small
  • Green Chillies, slit length wise – 7-8, adjust according to your preference. Can also add red chilli powder if you want.
  • Bay leaf – 1 large
  • Salt – to taste
  • Oil – 3 tbsp
  • Green chillies finely chopped – (optional) to garnish
  • Lime juice – to garnish
  • Cilantro, finely chopped – to garnish

DSC_0013

Method:

  1. Dry roast fennel seeds and black peppercorns. Let them cool down and then grind to a powder.
  2. Marinate chicken with well beaten yogurt, ginger garlic paste, and half of the ground spice powder. Keep the marinated chicken in the refrigerator for anytime between half an hour to 10 hours. The more you marinate, the better.
  3. Heat oil in a deep pan.
  4. Once hot, add a bay leaf and the onions. Fry them with a pinch of salt.
  5. As the onion starts browning add the remaining ground spice powder and mix well.
  6. Next add the marinated chicken and fry on high for a couple of minutes.
  7. As the chicken starts browning reduce the flame to a medium and cover and cook. Keep stirring in between and if required add a few drops of water. Usually I don’t have to add any water as this is not a curry dish and there will not be much gravy.
  8. Adjust salt and if required add red chilli powder. I usually add a lot of green chillies.
  9. Once the chicken is completely cooked garnish it with lime juice and finely chopped cilantro. Add some extra chopped green chillies if you want it to be extra hot.
  10. Serve it hot with Paratha (Indian bread), or rotis or with pulao.

DSC_0046copy

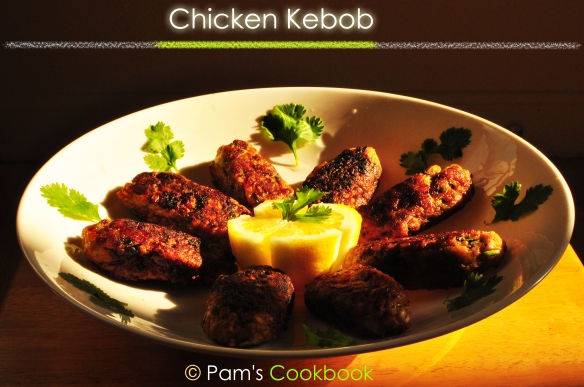
Chicken Kebab

Chicken Kabab

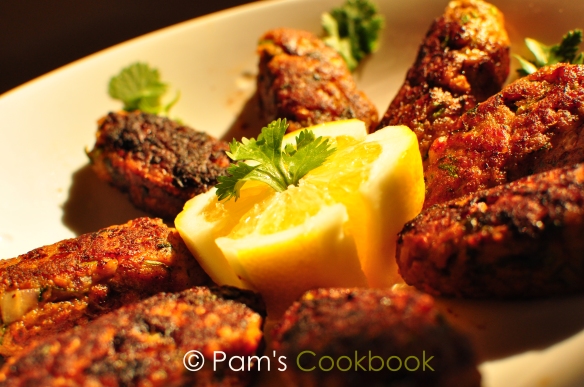
With the Oscars going on live I decided not to cook and live off the leftovers from the day before. Somehow, and I am not sure if it is just us, we are not enjoying the presentation that much and are only waiting for the awards and of course Adele ! So to accompany me with the ‘not so impressive’ (sorry to say that!) show I have a recipe that I prepared and clicked a very long time ago for a pot luck. It is an all time favorite for all of us – Kebab, here Chicken Kebab. Usually kebabs or kababs or kebobs are associated with mutton but the chicken version is also equally popular. Cook it on a stove top or in the oven or grill and you have a wonderful dish to greet your guests with. Hope you all like it and have a great time making it.

Hope the Oscars end on a better note than it started with!

DSC_0230

Ingredients:

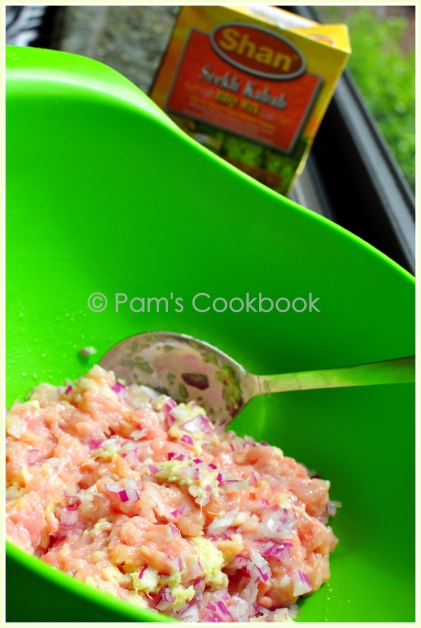
  • Chicken, minced – 1 lb (500 gms)
  • Onions, very finely chopped – 1 medium
  • Ginger paste – 1 tbsp
  • Garlic paste – 1 tbsp
  • Green chillies, finely chopped or red chilli powder – to taste
  • Garam Masala powder – 1 tsp
  • Coriander powder – 1 tbsp
  • Shan Chicken Seekh Kebab Masala – 3 tbsp (You can only use this masala and skip the above two in which case you may want to use the mentioned amount or more of it if you want it spicy. Or you may use this masala in combination with garam masala and coriander powder in which case adjust the amount. You may also skip it completely. Just remember this is a spicy mix and the amount of other spices and green chillies need to be altered accordingly).
  • Lime juice – 1 tbsp
  • Cilantro, finely chopped
  • Salt – to taste (if using Shan Kebab masala please note that it already contains sufficient salt so adjust accordingly; please refer to notes below)
  • Egg – 1
  • Bread crumbs – only to be used if required for binding. Can also use whole wheat flour in small quantity if bread crumbs are not available.
  • Oil / melted butter – for baking or stove top frying and basting

DSC_0241

Method:

1. Wash and drain the minced chicken before hand. If using frozen, thaw it and drain it with a paper towel to get rid of most of the moisture.

2. Mix the chicken with all the other ingredients – chopped onions, ginger garlic paste, green chillies / red chilli powder, Garam Masala powder, Coriander powder, Seekh Kebab Masala, Lime juice, cilantro, salt, egg – and mix well.

3. Refrigerate the mixture for 1/2 an hour to an hour. If in a hurry skip refrigerating though this helps in better marination and makes it firm enough to shape into kebabs.

4. Take out from the fridge and take a small mixture and try to form small balls out of it. If the mixture seems to be “too wet” then add bread crumbs to tighten it up.

5. Shaping the kebabs:

  • On a skewer – Oil your hands and wrap the chicken mixture around the skewer to form kebabs of desired length. If using wooden skewers, soak them in water for 30mins before using, that will prevent them from burning.
  • On a toothpick – Though not a frequently used technique but you can use toothpicks and wrap the chicken mixture around it to form kebabs. Avoid the coloured toothpicks and soak them in water before putting them on the grill or oven.
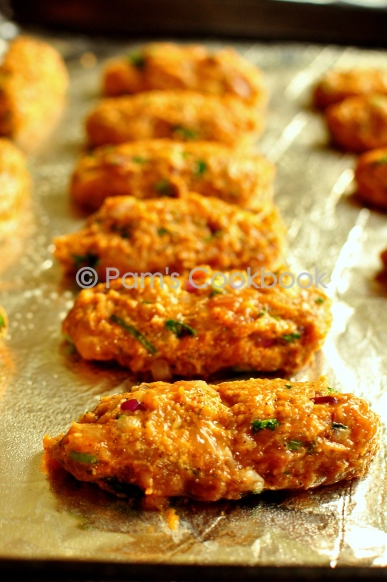
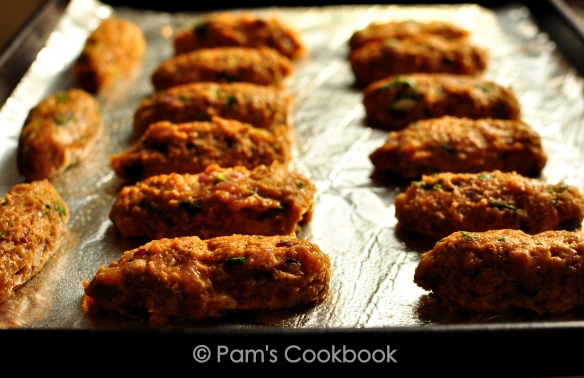
  • With hands – Take a small amount of the mixture and using your hands shape it into an oval or cylindrical shaped kebab as shown in the picture.

DSC_0245

6. Cooking the kebabs: Do not forget to baste them with oil (and lime juice if desired) so that they do not dry up. Do not over-cook them which might lead to the kebabs turning very dry.

  • On a grill – Cook the kebabs on the both the sides till done. Baste with oil / melted butter on each side when you flip them.
  • In the oven – Preheat oven to 400 F and bake them on both the sides till they are cooked. This should take 15 – 20 mins (10 mins approx. on each side) depending on the oven size. Baste them with oil / melted butter on both the sides when you flip them.
  • On the stove top – Alternatively you can also cook them on stove top. Heat a skillet and spray some oil on medium flame. Place the kebabs and cook them well turning around for even cooking. Keep spraying oil or drizzling melted butter on each side as they get cooked.

7. Once cooked , serve them hot immediately and garnish them with some lime juice if you want to.

Note: How to check for salt:

It is very difficult to check for salt and spices in the uncooked chicken so this technique might come in handy. Take a very small portion (say a pinch) of the chicken mixture and cook it on stove top for a couple of minutes, then taste it to check for salt and other spices. Adjust accordingly.

Chicken Kabab2

Lehsuni Murg

While growing up, I remember, Sundays were always special. It was a holiday for the whole family. As in any Bengali household all special days are celebrated with food, lots of food and even more food. So while there were luchis (poori) being fried for breakfast to accompany the ‘shada alu’r chochori’  (a side dish made with potatoes and no turmeric), somewhere the father would be getting freshly cut chicken and loads of vegetables from the Sunday market, masalas being prepared for the lunchtime chicken curry, tomatoes mashed for the ‘tomato chatni’, while we brother and sister watched our weekly Ramayan / Mahabharat. We could watch cartoons till mom took each of us for our cleaning… yeah it was the shampoo day and we would be scrubbed till our skins were burning, our ears cleaned till the eardrums filled with water and we jumping around to get it out of our ears. Once we had stuffed our selves with the sumptuous lunch and helped mom to clean the table (this was never applicable to my brother) we could do anything we wanted other than watch TV, would occasionally have some ‘mishti pan’ and doz off to sleep. If it was summer we would wake up to have ‘Frooti’ in its distinctive green colored tetrapack that dad always got as Sunday special. Evening spent by watching movies and catching up on studies and in no time Sunday was over.

This was a very long time ago and eventually we learnt to clean ourselves, we would in fact scream with embarrassment if anybody wanted to check our ears, Ramayan / Mahabharat long ago gave way to ‘Chandrakanta’ or maybe no TV at all (specially during high school). ‘Luchi’ was replaced with noodles and idlis, chicken curry preserved its position at lunch table, frootis were replaced with Thumbs Up and Pepsi. What remained constant was the celebration with food.

Now decades later  I realise this was a ‘mom-made ritual’ we all had religiously followed without any complaints till we left home.

Times have changed and now we have a 5 day work week. Which means Friday evening marks the beginning of the weekend and lasts till Sunday night. For me and Hubby-B Sundays are lazy days when we lament the end of the weekend, try to hold onto the last few hours before we have to face the week again. Sundays have long ceased to be the Special days being replaced by Fridays. And so I try to jazz up most of the Friday evenings with something special. I too have almost made a ritual out of it, just like my mom. Guess somethings are passed on without our being aware of.

One such Friday, more than a month ago, Lehsuni Murg or Spicy Chicken in Garlic was prepared (courtesy BongMom’s Cookbook) which never got posted till today. Am sure everyone has their own version of Lehsuni Murg and so do I. Hope you like my version. Enjoy!

Have a wonderful weekend!

Ingredients:

  • Chicken – 800 gms, cut into bite size pieces
  • Yogurt – 1/4th cup
  • Ginger paste – 1 tsp
  • Garlic paste – 1 tsp
  • Turmeric powder – 1/2 tsp + 1/2 tsp
  • Salt – to taste
  • Oil – as required
  • Onions – 1 large, thinly sliced
  • Garlic cloves, grated or paste – 1 large whole head
  • Sugar – 1/2 tsp
  • Tomatoes, pureed – 1 large
  • Ketchup – 1 tbsp or to taste
  • Hot Sauce – 1 tsp or to taste
  • Green chillies – 3 to 4 slit or to taste
  • Red Chilli – 2 or to taste (you can omit this if you want)
  • Panchphoron / Panch puran – 1/2 tsp
  • Lime juice – 1 -2 tsp
  • Coriander leaves – for garnishing

Method:

  • Marinate the chicken with yogurt, ginger garlic paste,1/2 tsp turmeric, salt and a few drops of oil.
  • Heat a pan and add oil to it. Add the finely sliced onions and fry them on moderately high flame till they turn brown. Do not burn them. Drain the fried onions on a paper towel and set aside for later use.
  • In the same hot oil add sugar and let it melt.
  • Add the paste of 1 whole garlic and fry on medium flame for a few minutes without burning them.
  • Next add the pureed tomatoes with green chillies, salt and 1/2 tsp turmeric . Cook till the raw smell and color is gone.
  • As the tomato gravy thickens add the marinated chicken pieces and mix well. Cover and cook on medium flame till the chicken is half way cooked and the liquid released from the chicken evaporates. Keep stirring in between.
  • Add the sauces (if desired) and mix well. Cover and cook for couple more minutes till the chicken is completely cooked and the gravy thickens to the desired consistency. This is not a gravy dish so the gravy needs to be thickened considerably, but again it is according to your preference.
  • In a separate pan dry roast red chilli and panchphoron. Cool and grind to a fine powder. Sprinkle this powder, lime juice and the fried onions to the chicken preparation and mix well.
  • Garnish with freshly chopped coriander leaves.

Serve with parathas or rotis.