Coffee Cake

Bday cake

Half a year has already passed by and it seems like just yesterday that we celebrated the start of a new year. Sumner is on its full bloom now, after what has been a very long winter. It feels so good to look outside at the clear blue skies and the greenery all around. I have come to appreciate such days even more, thanks to the East-coast weather.

Last couple of weeks have been quite busy. With the weather improving tremendously, the weeks go by planning summer events, weekend trips and concerts. Reading, movies and friends occupy the rest of the hours. And now-a-days of course the soccer matches. The blog had been going down in my list of priorities. It was only as I was changing the calendar for the month of July that I remembered this post pending since May. So finally, here it is. And though I silently promise to be a bit regular on my blog, I have stopped apologizing to my readers for my disappearances once in a while with the hope that they must have gotten used to it by now.

DSC_0609

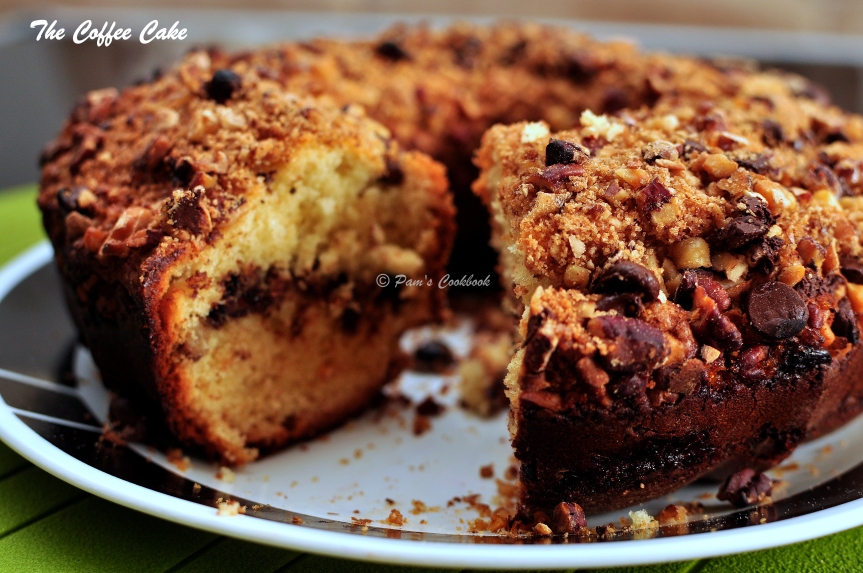
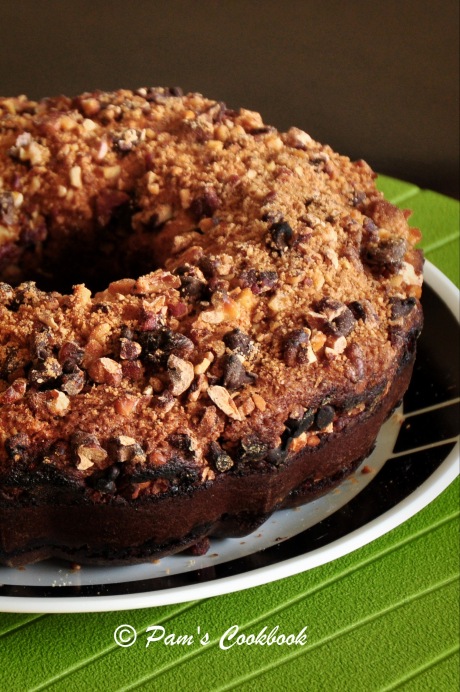
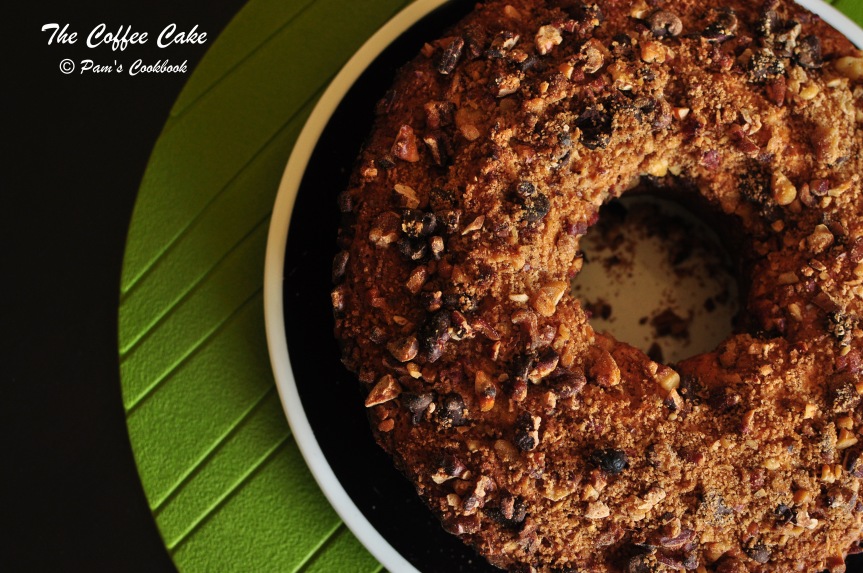
Today I will talk about the cake I made for my husband’s birthday. Though I love baking, I have not really tried out different cake recipes. Reason is that both of us prefer the sponge cake (recipe) that I had learnt from my mom. However this time I wanted to make something different. A while ago we had got an amazing coffee cake for a friend’s birthday from a nearby bakery. Since then I had been wanting to bake one of my own and what better day to do this than a birthday.

Interestingly, Coffee cake has no coffee in it, quite contrary to what I had assumed. It is known as a coffee cake as it is usually had with coffee.

Stephanie’s Joy of Baking had this recipe of a coffee cake which looked exactly like the one I had had. Being a big fan of her website which has wonderful baking videos and techniques, I did not want to look any further. The original recipe can be found here, the only change that I did was used plain yogurt instead of sour cream. As the recipe suggests using yogurt instead of sour cream gives a lighter textured cake.

DSC_0541

Ingredients:

  • All purpose flour – 1 2/3 cups or 215 gms
  • Baking Powder – 1 tsp
  • Baking Soda – 1/2 tsp
  • Salt – 1/4 tsp
  • Unsalted butter (at room temperature)- 1/2 cup or 113 gms
  • White Sugar – 1 cup
  • Eggs – 2
  • Vanilla extract – 1 tsp
  • Sour Cream / Yogurt – 3/4 cup or 180 ml

For the Crumb topping –

  • Walnuts or Pecans – 1 cup (I used a combination of walnuts and pecans, but you can use other nuts of your preference.)
  • Light brown sugar – Little less than 1/4 cup
  • Mini Chocolate chips – 1/3 cup. (I used the semi sweet ones but you can use any that you prefer.)
  • All purpose flour – 1 tbsp
  • Ground cinnamon – 1/2 tsp

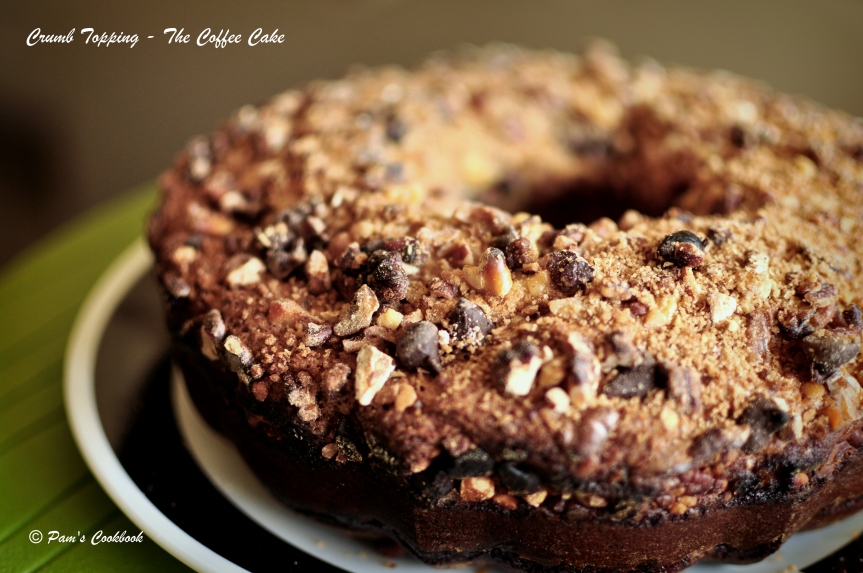
Crumb Topping

Method:

  • Preheat oven to 350 F.
  • Prepare a baking pan, preferably a spring form pan so that you don’t have to flip the baked cake which might result in messing up the crumb topping. I did not have one so i used a Bundt pan and needless to mention some of the crumb topping came out while flipping it. Whatever pan you choose, grease it with butter and dust it lightly with flour or line the greased pan with a parchment paper.

Prepare the crumb topping –

  • Dry roast the nuts on stove top or bake in a preheated oven at 350F for 8-10 minutes until lightly browned and fragrant. Let them cool. Coarsely chop them.
  • In a bowl mix the chopped nuts with the other ingredients mentioned for crumb topping – sugar, chocolate chips, flour and cinnamon and keep aside.

Prepare the Cake Batter –

  • In a bowl mix flour, baking soda, baking powder and salt, whisk together and keep aside.
  • In a  separate bowl add the softened butter and beat it well using a hand mixer / stand mixer.
  • Gradually add the sugar and beat well till light and fluffy.
  • Add the eggs, one at a time and beat well after each addition. Using a spatula or a spoon scrape the sides of the bowl so that everything is well incorporated.
  • Beat in the vanilla extract.
  • Next gradually add the flour in three additions alternating with the sour cream. Mix till everything is well combined and there are no lumps.

Assemble the Coffee Cake –

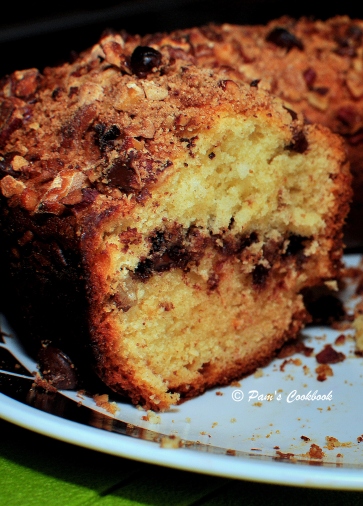
  • Since the batter will be thick, spoon out half of the batter into the prepared pan and smoothen the top with a spatula or the back of the spoon. If using a Bundt pan spoon out the mixture and place dollops of it all over the pan. This makes spreading the batter, in the Bundt pan, easy.
  • Sprinkle evenly approximately half of the crumb topping on top of the batter.
  • Again spoon out the remaining batter into dollops all over the crumb mixture. Lightly level it out so as not to disturb the crumb layer.
  • Sprinkle the remaining crumb mixture evenly.
  • Bake for about 40 – 50 minutes or until the cake is done and a toothpick inserted in tehe middle of the cake comes out clean.
  • Remove from the oven and let it cool for 10 minutes.
  • If using spring form cake, release the sides of the pan. If using any other cake pan, do what I did – gently flip the cake onto a plate. At this stage some of the crumb topping might come out. Take another plate and flip it once again so that the side with the crumb topping on top faces up. Gather the crumb topping that had come out of the cake and sprinkle it on top of it and press gently.

DSC_0614

Note: For a denser texture use sour cream and for a lighter cake use yogurt. Though I used yogurt, I would want to use sour cream the next time to for the denser texture.



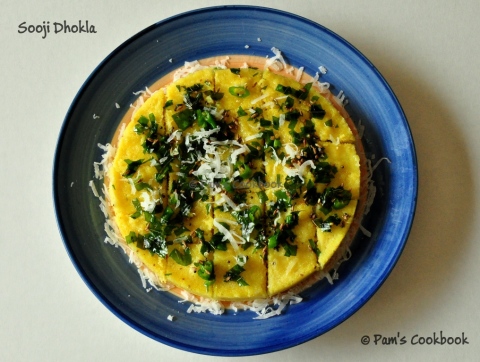
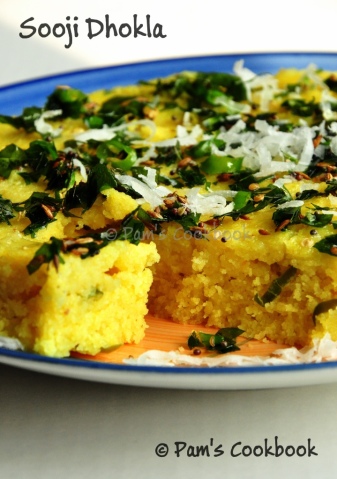
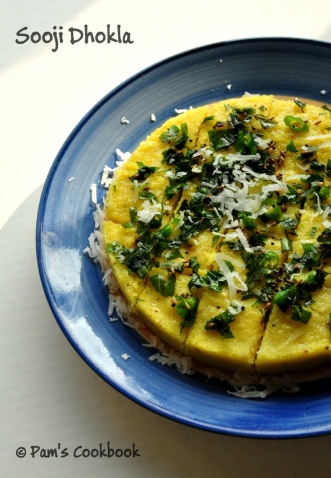
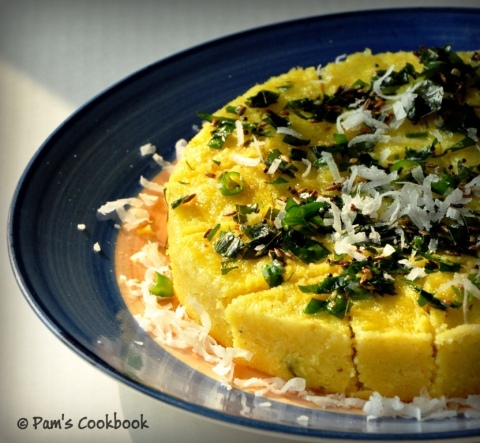
Sooji/Rava Dhokla

DSC_0797

A pending post, yet once again, from before I disappeared for more than a month. Not that I was doing anything significant. I was busy… just busy with something or the other and then came all the festivities and celebrations and of course the main reason – I was playing games on my iPad. Games which are silly but addictive like Candy Crush. And that doesn’t mean I had not been cooking. Infact I have cooked and clicked a lot in these few weeks, just never got around to write about them. And then yesterday when B left for a week long office trip and the lives on the Candy Crush game had expired and would not be active for 2-3 days (because of the date manipulations that I did … oh I really dont want to get into e) I realized I had blog which needed reviving badly. So here I am.. almost about to delete the games from the iPad and I find this draft lying unfinished from one afternoon. Here it goes.

DSC_0813

Dhokla is a snack from the Western parts of India, mainly Gujarat. It is usually made from fermented batter of rice and pulses, but we the Gen X folks have a quick and easy version for everything which does not take long hours of fermentation. My recipe here is made of Sooji/ Semolina/ Cream of wheat and I use fruit salt/ENO , though I have read that baking salt can also be used which is something that I still have to try out. Usually a dhokla steamer/stand comes very handy but I have a makeshift arrangement (explained below) for steaming the dhoklas that I have now got a hang of. Also you can make it in a microwave though I still have to try that out. Dhoklas are great for serving with evening tea or for breakfast and I usually serve it with a coconut chutney or a mint-coroander-tamarind chutney.

DSC_0815-001

Ingredients:

  • Sooji / Semolina – 1 cup
  • Ajwain / Carom Seeds – 1/4 tsp
  • Oil – 1 tbsp
  • Yougurt, well beaten – 1/2 cup
  • Ginger – 1/2 tsp
  • Turmeric powder – a pinch
  • Salt – 1/2 tsp or to taste
  • Green Chillies – 2 or to taste, finely chopped
  • Water – 1/2 cup approx. or as required
  • Oil / Spray Oil
  • Eno fruit salt – 1 tsp

For Seasoning:

  • Oil – 1 tbsp
  • Mustard seeds – 1/2 tsp
  • Sesame seeds or Cumin Seeds (optional) – 1/2 tsp
  • Curry leaves, roughly chopped – handful

For Garnishing: optional

  • Coriander Leaves, finely chopped
  • Coconut flakes or grated coconut

DSC_0803

Method:

  • Combine sooji, ajwain and oil in a mixing bowl till they are well mixed and there are no lumps.
  • In a separate bowl beat the yogurt well, add ginger, turmeric powder, salt and green chillies and mix well.
  • Mix the yogurt mixture with the sooji mixture and till everything is well mixed.
  • Gradually add sufficient water to make a thick batter (like idli batter). Let the batter rest for 20 mins.
  • Meanwhile prepare the dhokla stand by oiling the plates lightly. I do not have a dhokla stand so here is my makeshift arranegement. I use a steel tiffin box and spray oil the base and a normal pot with a lid where my tiffin box fits nicely. I place the lid of the steel tiffin box in the boiling water (top side facing up) and then place the box with the dhokla batter on top of the lid uncovered. You can use any plate or bowl instead of the lid and then place the steel box on top of it. Instead of the pot you can also use  a tall pressure cooker without the whistle.
  • Fill the steamer or pressure cooker or the pot with 1 to 1 1/2inch of water and Bring it to a boil.
  • Once the water comes to a boil add eno to the batter and mix well. Immediately pour the batter into the stands / tiffin box
  • Place the stand inside the steamer / pressure cooker /pot and cover the lid and steam for 12-15 mins approx. Test the ‘doneness’ by inserting a toothpick till it comes out clean.
  • Once done remove the stands or the tiffin box and let it cool for a couple of minutes.
  • Meanwhile prepare the seasoning by heat 1 tbsp of oil and tempering it with curry leaves, mustard and cumin seeds.
  • Taking a knife gently loosen up the edges of the dhokla and take the whole thing out on a plate.
  • Pour the seasoning on top of it and garnish with chooped coriander leaves and grated coconut.
  • Cut it into square pieces and serve it with any chutney of your choice. I use a coconut chutney or a mint-coroander-tamarind chutney.

Breakfast Egg Muffins

DSC_0414

Till recently breakfast has always been a ‘no-sweat’ effort for me. Even as a child going to a morning school that started from 7:45 and lasted till 1:45, almost all days me and my brother would either have a glass of milk and biscuits or cornflakes in the morning. And our ‘tiffin’ (lunch packs were then and even now called tiffin) would inevitably contain bread butter and sugar or bread butter with salt and pepper or bread and jam. We hardly ever complained; we were good kids to a working mom. There were some days when we would take Maggi, and later in high school my mom would also make some parathas with achar but those were rare. Of course weekends were special days when we would have puri sabji or noodles or idli etc but Bread was the most preferred snack. My friends would often bring different lunches and I would happily share my slices for some bites from someone else’s box. Now looking back I wonder how we never ever got bored of it.

DSC_0426

Breakfast was always the same all through my college and after that when I started working – Bread butter, milk and banana or any other fruit. It was always easy to prepare and quick to consume. When I got married and took over the kitchen duties I would cook a lot of variations for lunch and dinner but breakfast was something that I tried to keep simple. Work, here in US, starts pretty early (as compared to India) so I never really ventured into an elaborate morning meal. I would always tell myself that there was no point in elevating the expectation of my newly wedded husband. I replicated my earlier days and gave either bread butter with tea or cornflakes. Recently (since the last one and half years) I have tried to change the custom of “easy breakfast”. These days I consciously try to eat healthy food and adopt a healthy food habit. And I have realized that the first meal of the day needs to be the most significant one. So most of the days I try waking 15  minutes early to prepare both of us a filling breakfast and its one meal of the day that we religiously take on the dining table together. (Dinner is mostly on the couch in-front of the Television).

Usually I have a list of options that I choose from, depending on how much time I have in the morning. It could be either upma, poha, pancakes, stuffed omlettes  with butter toast or toast with scrambled eggs, all served with a warm cup of tea – and all prepared within the 15-20 mins timeframe. When I have even less time I go for toast and poached eggs or the age old option of butter toasts/cornflakes. Weekends will find me baking even for breakfasts or trying something new. Today’s post is on breakfast egg muffins that I made one Saturday morning just because I wanted to try something different. I had found this recipe and the pics looked so tempting that I had to try it out. The pictures sure did come out very nice.

DSC_0431

My honest feedback – Taste wise they were not as great as they looked. It was okay for something new or different but nothing that excited me. However I think its a great breakfast option for working people since you can prepare and freeze them. You can also use this as a ‘to-go’ snack and am sure the kids would love these variations.

I will really appreciate if anyone of you let me know your feedback if and when you prepare this.

There are a couple of ways to prepare this, and you can choose to add or reduce any no. of ingredients to this. I am providing a rough guideline – this is the way I made it, however feel free to be creative. Also I wanted to keep it healthy so avoided cheese but these will definitely taste much better if you can add some.

DSC_0420

Ingredients: (for 4 egg muffins) –

  • Bread slices – 4
  • Eggs – 4
  • Personalised toppings, cut into small pieces – Add any ingredient of your choice like onions, bell pepper, mushrooms, tomatoes, spinach, bacon, broccoli, cheese etc. I used only small pieces of onions, bell pepper and mushrooms.
  • Seasoning – Salt, Pepper powder, any other of your choice. I added some Cajun spice.
  • Butter or Oil – as required

Method:

  • Preheat oven to 350 F. Grease the muffin pan / ramekins with some oil/butter; Alternatively use muffin liners or line it with a parchment paper (cut a circle slightly bigger than the diameter of the muffin cups and place it).
  • With a rolling pin flatten the bread slices slightly and with a cookie cutter (or use the rim of a glass) roughly cut the slices in rounds, almost 4-5 inches in diameter.
  • Cut each round in half, then press 2 halves into each muffin cup, overlapping slightly and making sure bread comes up to edge of cup. Use extra bread to patch any gaps. If you prefer brush the bread with some butter.
  • In a pan, add some oil or butter and lightly fry the onion, bell pepper and mushrooms (or any other topping of your choice) with salt, pepper and any other seasoning that you prefer. Once cooked distribute it equally onto the muffin cups lined with the bread slices.
  • Sprinkle some grated cheese of your choice. I skipped this step.
  • Next step is to add the eggs. You can do this in 3 different ways:

1. Crack the eggs into the muffin cups and sprinkle some salt,pepper, or any other seasoning of your choice. This is how it will look when done:

DSC_0404

2. Crack the eggs into the muffin cups, using a fork lightly break the yolk (inside the muffin cup) and let it spread.

3. Beat the egg with a tablespoon of milk in a separate bowl, sprinkle some seasoning and pour it into the muffin cups. This is how it will look when done:

DSC_0409

I made 4 muffins – 2 of option 1 and 2 of option 3.

  • Bake the muffins at 350 F for 7-10 mins or until the egg whites are set. Temperature and baking time may vary from oven to oven. Do not over cook the eggs or they will become rubbery. The muffins will continue to cook for sometime even when out of oven so keep that in mind. Mine took 7 mins to bake and then 5 more minutes to cool down. I prefer the yolk on the soft side than over cooked.
  • Once the muffins have cooled down, gently take them out by running a small knife around the cups. Serve immediately with tea/coffee/juice.

Storage:

You can make these muffins in batches and freeze them for later use. Let the muffins cool down completely and then wrap them and freeze in a zip-lock bag or a freezer bag. For reheating wrap in a paper towel and reheat in microwave.

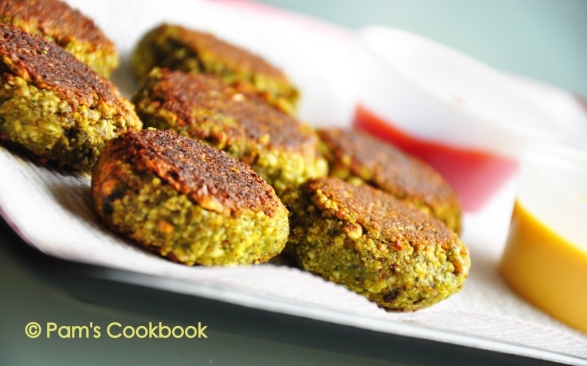
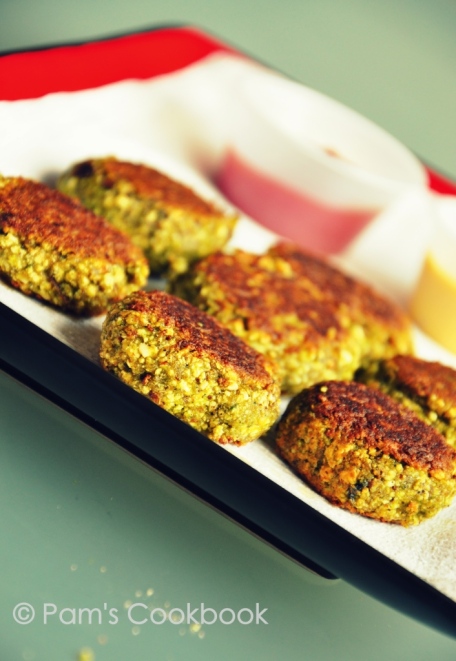
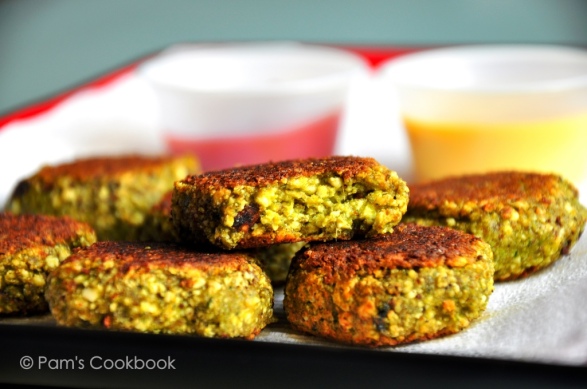
Hara Bhara Kabab – Green Kabab

DSC_0395

2011 September – Dubai Airport  – I am traveling with my husband to India via Dubai… tired… excited and yearning to see my family, to celebrate the festive season and to be in my city. Another couple of hours for my connecting flight, have already seen enough of the airport (which is very very nice) and so am stretching out on one of the lounge chairs, my husband on my right and an unknown lady to my left. In no time the two of us are engrossed in a conversation with the lady. She is a Dutch, hailing from Holland and is going to visit a couple of friends in Kolkata for the Durga Pujas. We talk a lot about the countries and culture we belong to and I tell her about my city of joy. That amidst all the colors and the beauty of the place she may find it a little noisy and cluttered, and that I find those very traits make the city so much alive, specially at this time of the year. As we talk aimlessly the time for our connecting flight draws near and we bid good byes. The last glimpse I have of her is in Kolkata airport as each of us stand in the immigration line. Two people – from different parts of the world meet for a while and then carry on to their respective destinations.

She is forgotten… I do not recall her name any longer… just one of the many people we met on a long distance journey. The chances of us meeting again is null – zero. Holland is not a place I plan to visit very soon. And I do not expect her to be in Kolkata ever again.. well neither in US. So that is the end of our story.. the chance meeting with an interesting person … good conversation and time well spent.  One of the benefits of staying in different places and traveling is that you get to meet many kinds of people, you get to hear many kinds of stories, different experiences… different lives. And I am always enchanted by good stories. The stories make me think .. make me imagine… make me long.

DSC_0376

12 months later…

2012 (October) – Dubai airport – I am going to India for 4 weddings in the family, one of which is my own brother’s. All geared up for the major preparations… the only not-so-good part is that I am traveling alone. The husband will follow me a month later. I have my books and music to give me company but I was already missing him. I managed to chat with a couple of my co-passengers (all of them going to Kol). I am about to reach the specific Gate allotted for my next connection when something familiar crosses my eyes – or someone. I am not sure if my memory serves me right – but – I know I am right – It is her !

Not able to withstand any longer, I reach up to her… to check if I am correct, to check if she remembers me from a year ago. And voila – she is the very same lady from Holland and she remembers. For a couple of seconds I feel I am in a déjà vu. What was the probability of us meeting again, in the same airport, traveling on the same day and around the same time of the year ( just a 2-3 days left for Dushera as last year). I had thought  none and was gladly  mistaken. We hug each other as if long-lost friends. We click our pics, talk for some time, exchange mail ids. I am happy, so elated. I want to share this with BBC, the strangeness of the whole situation has affected me strongly. And as I hop onto my flight I am smiling.

DSC_0400

Life is, after all, so full of surprises; and the world around us is becoming smaller day by day. I now have a Dutch friend and a reason to plan for a trip to Holland someday. As Oprah says – “… chance encounters aren’t necessarily accidental; in fact, you can make your own luck by opening yourself to the world. ” I want to be receptive to new things in my life… new people, new places, new experiences. And one day I do hope to begin to understand the mysterious ways of this universe.

P.S. – As I posted this to the blog, I updated my Facebook browser and a birthday reminder pops up – its that of my Dutch friend. How strange that today is her birthday and unknowingly I dedicated today’s post to her. (Happy Birthday dear friend!)

Today’s post Hara Bhara Kabab is inspired from Tarla Dalal’s recipe. Hope you enjoy it.

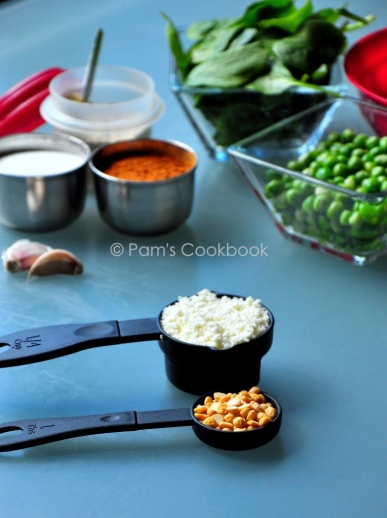
Ingredients:

DSC_0324

  • Paneer (Indian Cottage cheese) – 1/2 cup
  • Spinach leaves – 1 cup tightly packed
  • Chana Dal – 2-3 tbsp
  • Ginger, finely chopped – 1 tbsp
  • Garlic, finely chopped – 1 tbsp
  • Green Chillies, chopped – 3-4
  • Green Peas, boiled – 1/4 cup
  • Water – 3/4 cup
  • Salt – to taste
  • Chaat Masala – to taste
  • Garam Masala – 1 tsp
  • Bread Crumbs – 2 tbsp
  • Oil/Oil Spray – as required

DSC_0353

Method:

  • Grate the paneer or process it in a food processor.
  • Clean, wash and blanch the spinach as mentioned. Blanching Spinach greens: On a high heat bring a large pot with water to boil. Add the spinach leaves to boiling water. Cover and let it cook for 1-2 minutes. Remove the leaves using a slotted spoon or drain using a colander. Wash the wilted leaves with ice cold water. Drain water and squeeze out any excess water from the leaves.
  • Pressure cook chana dal with ginger garlic and green chillies with 3/4 cup of water for 2-3 whistles or until the dal is cooked. Drain the dal and remove excess water.
  • Blend the cooked dal with boiled peas and blanched spinach leaves to a fine paste. If required use only 1-2 tsp of water.
  • Combine this paste with the grated paneer.
  • Add salt, garam masala and chat masala to the mixture.
  • Add bread crumbs and mix well.
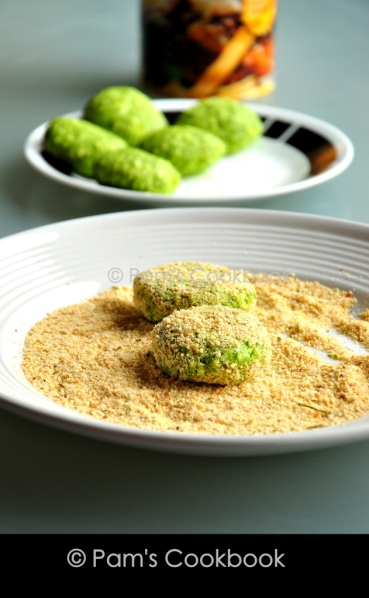
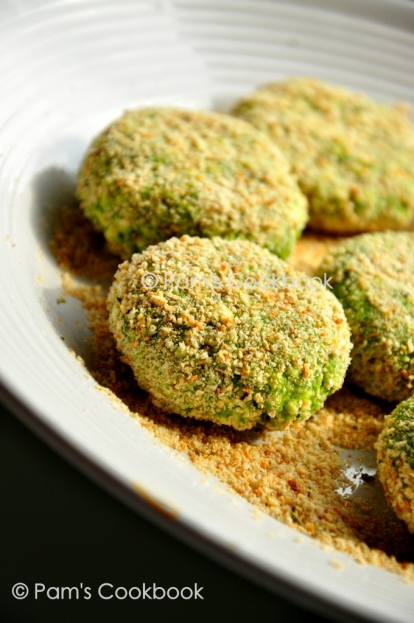
  • Take a spoonful of the mixture and shape it into a round ball. Press the balls to get a round flattened shape like that of a cutlet. You can keep the round shape or form cylindrical shapes as well. However I find this shape easy to cook on stove top.
  • This is an optional step. If you want your kababs to be have a crunchy coating you can roll them onto some additional bread crumbs or else you can omit this step and fry the kababs as it is. I tried coating them with bread crumbs but did not appreciate the result. Additionally the bread crumbs were giving it a burnt look. You can try it both ways for the first time.

DSC_0365

Cooking the kababs:

DSC_0374

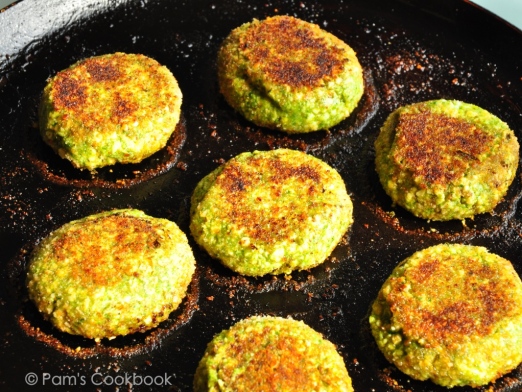
  1. Stove top: I used this method and it is definitely a healthier option. Heat a skillet on a medium flame and spray some oil. Place the kababs and cook them well turning around for even cooking. If required keep spraying oil or drizzling melted butter on each side as they get cooked.
  2. Deep frying: You can deep fry the kababs till they turn golden brown. You can also make a batter of flour/maida, dip the kababs, roll them on bread crumbs and deep fry them.
  3. In the oven – Preheat oven to 350 F and bake them on both the sides till they are cooked. This should take 15 – 20 mins (10 mins approx. on each side) depending on the oven size. Baste them with oil / melted butter on both the sides when you flip them.

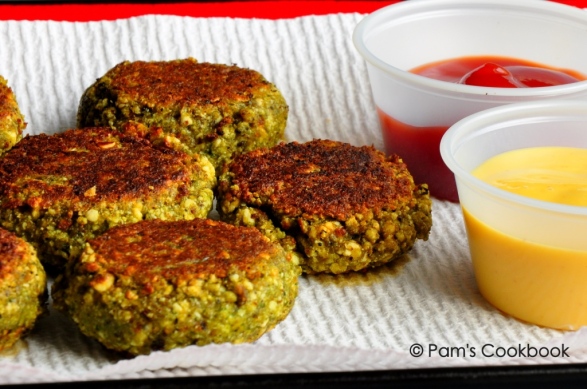
Serve them with any chutney, tomato sauce or dip.

DSC_0390