Coffee Cake

Bday cake

Half a year has already passed by and it seems like just yesterday that we celebrated the start of a new year. Sumner is on its full bloom now, after what has been a very long winter. It feels so good to look outside at the clear blue skies and the greenery all around. I have come to appreciate such days even more, thanks to the East-coast weather.

Last couple of weeks have been quite busy. With the weather improving tremendously, the weeks go by planning summer events, weekend trips and concerts. Reading, movies and friends occupy the rest of the hours. And now-a-days of course the soccer matches. The blog had been going down in my list of priorities. It was only as I was changing the calendar for the month of July that I remembered this post pending since May. So finally, here it is. And though I silently promise to be a bit regular on my blog, I have stopped apologizing to my readers for my disappearances once in a while with the hope that they must have gotten used to it by now.

DSC_0609

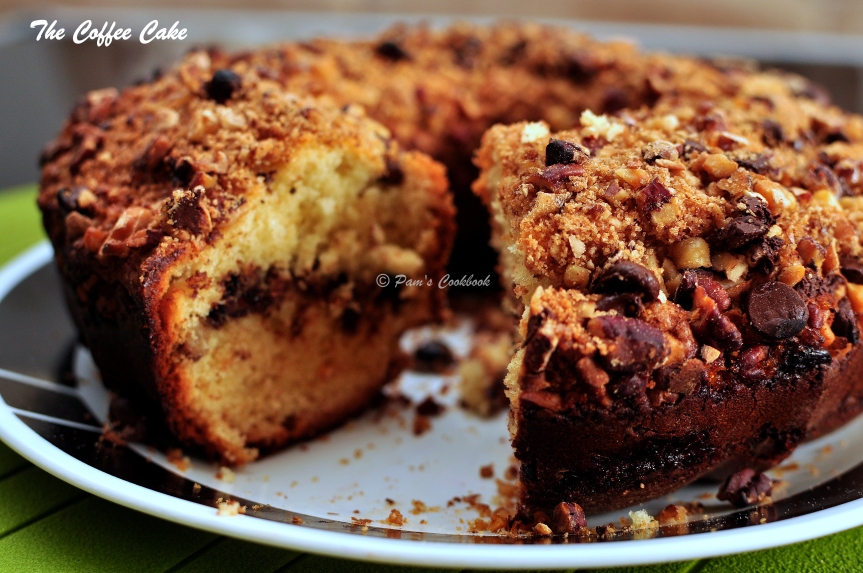
Today I will talk about the cake I made for my husband’s birthday. Though I love baking, I have not really tried out different cake recipes. Reason is that both of us prefer the sponge cake (recipe) that I had learnt from my mom. However this time I wanted to make something different. A while ago we had got an amazing coffee cake for a friend’s birthday from a nearby bakery. Since then I had been wanting to bake one of my own and what better day to do this than a birthday.

Interestingly, Coffee cake has no coffee in it, quite contrary to what I had assumed. It is known as a coffee cake as it is usually had with coffee.

Stephanie’s Joy of Baking had this recipe of a coffee cake which looked exactly like the one I had had. Being a big fan of her website which has wonderful baking videos and techniques, I did not want to look any further. The original recipe can be found here, the only change that I did was used plain yogurt instead of sour cream. As the recipe suggests using yogurt instead of sour cream gives a lighter textured cake.

DSC_0541

Ingredients:

  • All purpose flour – 1 2/3 cups or 215 gms
  • Baking Powder – 1 tsp
  • Baking Soda – 1/2 tsp
  • Salt – 1/4 tsp
  • Unsalted butter (at room temperature)- 1/2 cup or 113 gms
  • White Sugar – 1 cup
  • Eggs – 2
  • Vanilla extract – 1 tsp
  • Sour Cream / Yogurt – 3/4 cup or 180 ml

For the Crumb topping –

  • Walnuts or Pecans – 1 cup (I used a combination of walnuts and pecans, but you can use other nuts of your preference.)
  • Light brown sugar – Little less than 1/4 cup
  • Mini Chocolate chips – 1/3 cup. (I used the semi sweet ones but you can use any that you prefer.)
  • All purpose flour – 1 tbsp
  • Ground cinnamon – 1/2 tsp

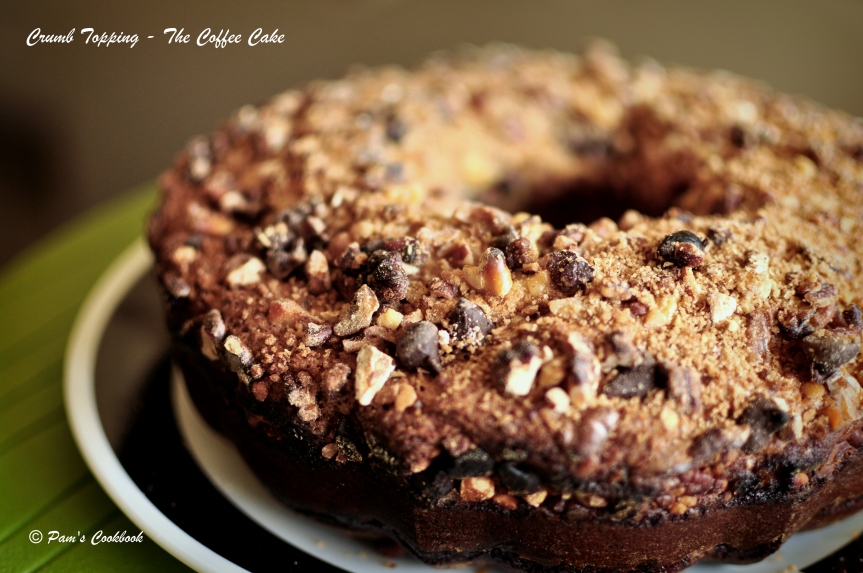
Crumb Topping

Method:

  • Preheat oven to 350 F.
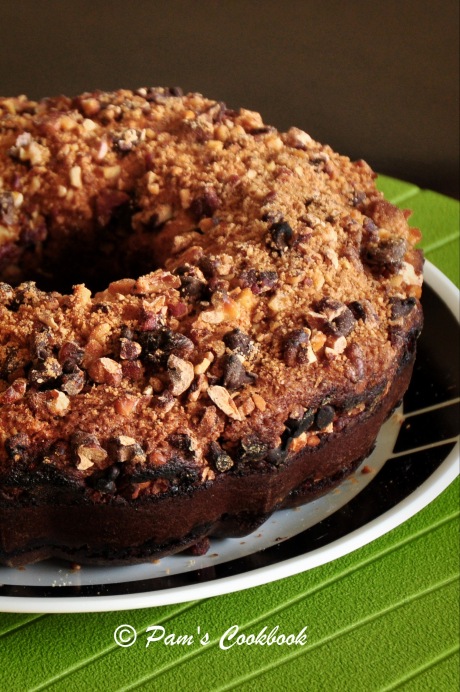
  • Prepare a baking pan, preferably a spring form pan so that you don’t have to flip the baked cake which might result in messing up the crumb topping. I did not have one so i used a Bundt pan and needless to mention some of the crumb topping came out while flipping it. Whatever pan you choose, grease it with butter and dust it lightly with flour or line the greased pan with a parchment paper.

Prepare the crumb topping –

  • Dry roast the nuts on stove top or bake in a preheated oven at 350F for 8-10 minutes until lightly browned and fragrant. Let them cool. Coarsely chop them.
  • In a bowl mix the chopped nuts with the other ingredients mentioned for crumb topping – sugar, chocolate chips, flour and cinnamon and keep aside.

Prepare the Cake Batter –

  • In a bowl mix flour, baking soda, baking powder and salt, whisk together and keep aside.
  • In a  separate bowl add the softened butter and beat it well using a hand mixer / stand mixer.
  • Gradually add the sugar and beat well till light and fluffy.
  • Add the eggs, one at a time and beat well after each addition. Using a spatula or a spoon scrape the sides of the bowl so that everything is well incorporated.
  • Beat in the vanilla extract.
  • Next gradually add the flour in three additions alternating with the sour cream. Mix till everything is well combined and there are no lumps.

Assemble the Coffee Cake –

  • Since the batter will be thick, spoon out half of the batter into the prepared pan and smoothen the top with a spatula or the back of the spoon. If using a Bundt pan spoon out the mixture and place dollops of it all over the pan. This makes spreading the batter, in the Bundt pan, easy.
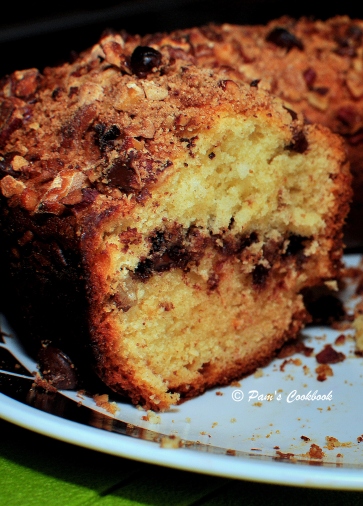
  • Sprinkle evenly approximately half of the crumb topping on top of the batter.
  • Again spoon out the remaining batter into dollops all over the crumb mixture. Lightly level it out so as not to disturb the crumb layer.
  • Sprinkle the remaining crumb mixture evenly.
  • Bake for about 40 – 50 minutes or until the cake is done and a toothpick inserted in tehe middle of the cake comes out clean.
  • Remove from the oven and let it cool for 10 minutes.
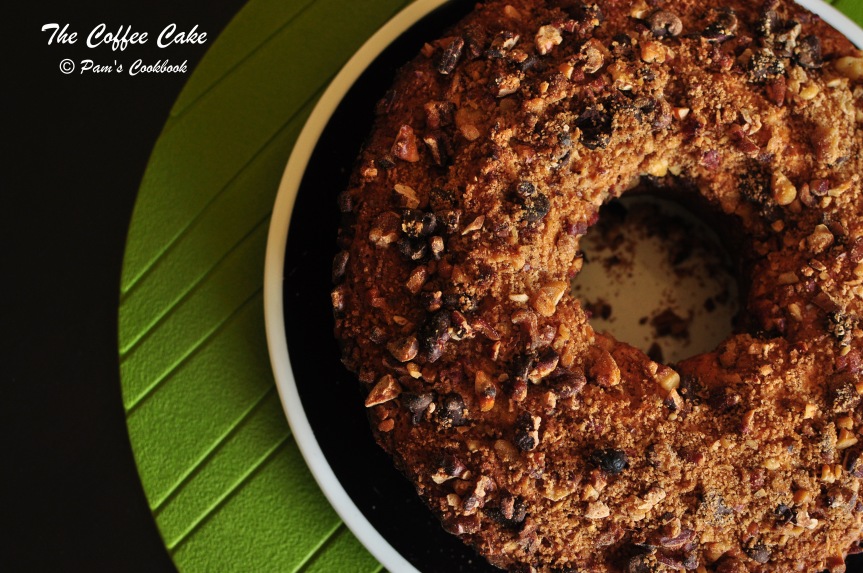
  • If using spring form cake, release the sides of the pan. If using any other cake pan, do what I did – gently flip the cake onto a plate. At this stage some of the crumb topping might come out. Take another plate and flip it once again so that the side with the crumb topping on top faces up. Gather the crumb topping that had come out of the cake and sprinkle it on top of it and press gently.

DSC_0614

Note: For a denser texture use sour cream and for a lighter cake use yogurt. Though I used yogurt, I would want to use sour cream the next time to for the denser texture.



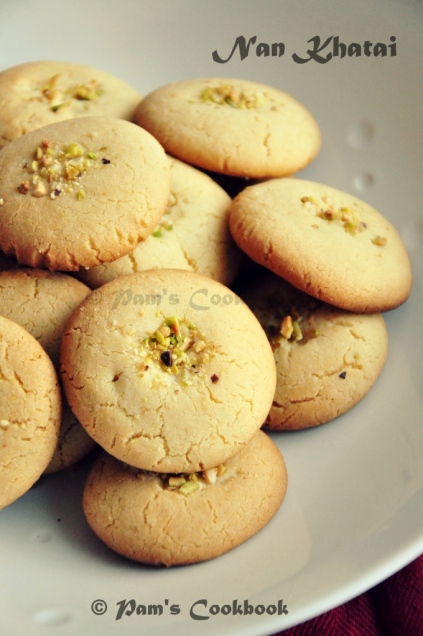
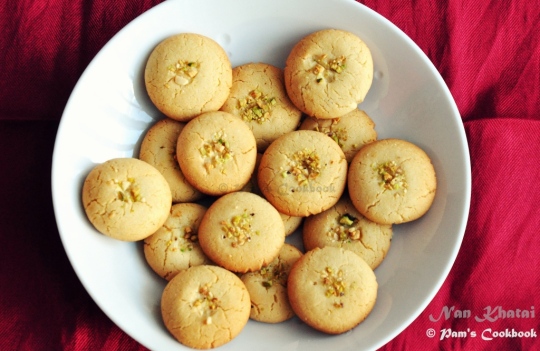
Nan Khatai / Indian Eggless Cookies

DSC_0240'

Last time it snowed this heavily (at the beginning of this year) I remember taking out my baking gear, kneading a dough and whipping up a bunch of cookies. What is it with winter that we crave for warmth in silly things like a cup of hot chocolate or a plate of cookies or croissant, warm and fresh out from the oven. And no … the store bought ones cannot give that balmy feel. What is winter if your home does not fill up with the aroma of freshly baked goods. While there is nothing like curling up on the couch, snuggling happily under the comforts of a soft plush throw flicking through the pages of a gripping thriller, it is equally rewarding to bake up something sweet or savory for the cold weather. And well who can say no to a little respite from the chill outside as you open the oven door to check on the progress.

DSC_0163

Now the  year has almost come to an end and the first heavy snowfall of this winter inspired a baking spree yet once again. This time I thought of making NanKhatai from Arundhati’s blog. I had already tried this recipe before and it was such a super success that I did not bother looking for an alternate recipe.

For those who are hearing this name for the first time and wondering what on earth it could be – well its another name for Indian egg less cookies, primarily made with clarified butter called ghee (or butter). But they have an Iranian/Persian origin as I concluded from some research on the web. To know more read this article.

DSC_0238

As a child we would get these cookies/biscuits from the bakery man who would come to our doorstep with bread and baked goods. They were always special and less accessible than the usual Marie or ParleG biscuits. As the article rightly says – The soft crumbly nankhatai brings back many a fond memory! To be able to make it at the drop of a hat gives a lot of joy to me and brings it all back home. Sharing this wonderful and super easy recipe.

DSC_0193

Ingredients:

  • All Purpose Flour/Maida – 1 cup
  • Gram Flour Besan – 1/2 cup
  • Baking Powder – 1/2 tsp
  • Baking Soda – 1/4 tsp
  • Cardamom Powder – 1/4 tsp
  • Butter/Ghee – 100 gms or 7 tbsp
  • Powdered Sugar – 1/2 cup
  • Milk – 1-2 tbsp. as required
  • Chopped nuts for garnishing, I used chopped cashews and pistachios

Note – The recipe suggests butter or ghee but strongly recommends using ghee. However  I made these using butter.

DSC_0199

Method:

  • Preheat the oven to 350 F and line a baking sheet with a parchment paper or grease it with some butter/ghee.
  • Seive All Purpose Flour, Gram flour, Baking powder, Baking soda into a mixing bowl.
  • Add cardamom powder to it.
  • In a separate bowl beat the softened butter or ghee and sugar together.
  • Next add the flour mixture and knead it into a dough. At this stage, if you need, add little milk at a time to help in the kneading process. I added 1-2 tbsp but you can adjust the amount as required.
  • Once the dough is done make small balls and flatten them a little with your palms.Top them with chopped nuts for garnishing and press them a little.
  • Place the cookies onto the lined baking sheet, a little apart from each other.
  • Bake them at 350F for 12-15 minutes or till done. Oven timings may vary. The recipe suggests 18-20 minutes, but mine were done in 12 minutes. Test the ‘doneness’ by inserting a toothpick till it comes out clean.
  • Once done remove from oven and place on a wire rack to cool. Always remember that cookies continue to cook for a while even when out of oven, so prevent over-baking.

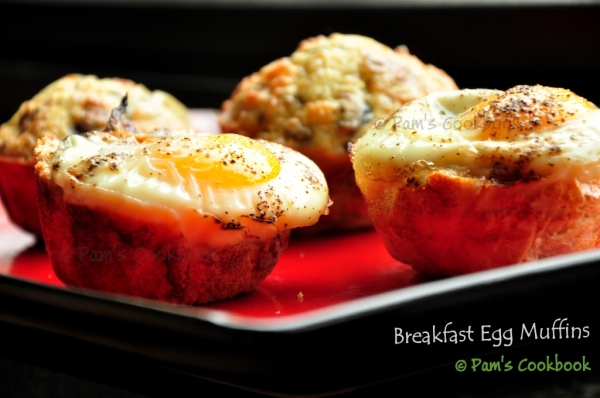
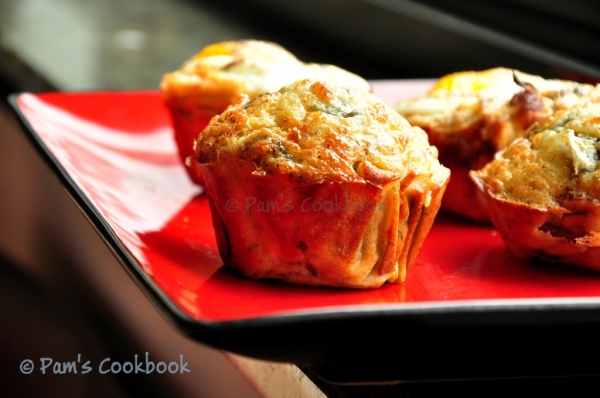
Breakfast Egg Muffins

DSC_0414

Till recently breakfast has always been a ‘no-sweat’ effort for me. Even as a child going to a morning school that started from 7:45 and lasted till 1:45, almost all days me and my brother would either have a glass of milk and biscuits or cornflakes in the morning. And our ‘tiffin’ (lunch packs were then and even now called tiffin) would inevitably contain bread butter and sugar or bread butter with salt and pepper or bread and jam. We hardly ever complained; we were good kids to a working mom. There were some days when we would take Maggi, and later in high school my mom would also make some parathas with achar but those were rare. Of course weekends were special days when we would have puri sabji or noodles or idli etc but Bread was the most preferred snack. My friends would often bring different lunches and I would happily share my slices for some bites from someone else’s box. Now looking back I wonder how we never ever got bored of it.

DSC_0426

Breakfast was always the same all through my college and after that when I started working – Bread butter, milk and banana or any other fruit. It was always easy to prepare and quick to consume. When I got married and took over the kitchen duties I would cook a lot of variations for lunch and dinner but breakfast was something that I tried to keep simple. Work, here in US, starts pretty early (as compared to India) so I never really ventured into an elaborate morning meal. I would always tell myself that there was no point in elevating the expectation of my newly wedded husband. I replicated my earlier days and gave either bread butter with tea or cornflakes. Recently (since the last one and half years) I have tried to change the custom of “easy breakfast”. These days I consciously try to eat healthy food and adopt a healthy food habit. And I have realized that the first meal of the day needs to be the most significant one. So most of the days I try waking 15  minutes early to prepare both of us a filling breakfast and its one meal of the day that we religiously take on the dining table together. (Dinner is mostly on the couch in-front of the Television).

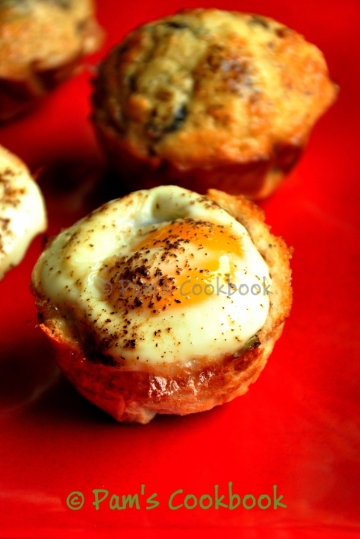
Usually I have a list of options that I choose from, depending on how much time I have in the morning. It could be either upma, poha, pancakes, stuffed omlettes  with butter toast or toast with scrambled eggs, all served with a warm cup of tea – and all prepared within the 15-20 mins timeframe. When I have even less time I go for toast and poached eggs or the age old option of butter toasts/cornflakes. Weekends will find me baking even for breakfasts or trying something new. Today’s post is on breakfast egg muffins that I made one Saturday morning just because I wanted to try something different. I had found this recipe and the pics looked so tempting that I had to try it out. The pictures sure did come out very nice.

DSC_0431

My honest feedback – Taste wise they were not as great as they looked. It was okay for something new or different but nothing that excited me. However I think its a great breakfast option for working people since you can prepare and freeze them. You can also use this as a ‘to-go’ snack and am sure the kids would love these variations.

I will really appreciate if anyone of you let me know your feedback if and when you prepare this.

There are a couple of ways to prepare this, and you can choose to add or reduce any no. of ingredients to this. I am providing a rough guideline – this is the way I made it, however feel free to be creative. Also I wanted to keep it healthy so avoided cheese but these will definitely taste much better if you can add some.

DSC_0420

Ingredients: (for 4 egg muffins) –

  • Bread slices – 4
  • Eggs – 4
  • Personalised toppings, cut into small pieces – Add any ingredient of your choice like onions, bell pepper, mushrooms, tomatoes, spinach, bacon, broccoli, cheese etc. I used only small pieces of onions, bell pepper and mushrooms.
  • Seasoning – Salt, Pepper powder, any other of your choice. I added some Cajun spice.
  • Butter or Oil – as required

Method:

  • Preheat oven to 350 F. Grease the muffin pan / ramekins with some oil/butter; Alternatively use muffin liners or line it with a parchment paper (cut a circle slightly bigger than the diameter of the muffin cups and place it).
  • With a rolling pin flatten the bread slices slightly and with a cookie cutter (or use the rim of a glass) roughly cut the slices in rounds, almost 4-5 inches in diameter.
  • Cut each round in half, then press 2 halves into each muffin cup, overlapping slightly and making sure bread comes up to edge of cup. Use extra bread to patch any gaps. If you prefer brush the bread with some butter.
  • In a pan, add some oil or butter and lightly fry the onion, bell pepper and mushrooms (or any other topping of your choice) with salt, pepper and any other seasoning that you prefer. Once cooked distribute it equally onto the muffin cups lined with the bread slices.
  • Sprinkle some grated cheese of your choice. I skipped this step.
  • Next step is to add the eggs. You can do this in 3 different ways:

1. Crack the eggs into the muffin cups and sprinkle some salt,pepper, or any other seasoning of your choice. This is how it will look when done:

DSC_0404

2. Crack the eggs into the muffin cups, using a fork lightly break the yolk (inside the muffin cup) and let it spread.

3. Beat the egg with a tablespoon of milk in a separate bowl, sprinkle some seasoning and pour it into the muffin cups. This is how it will look when done:

DSC_0409

I made 4 muffins – 2 of option 1 and 2 of option 3.

  • Bake the muffins at 350 F for 7-10 mins or until the egg whites are set. Temperature and baking time may vary from oven to oven. Do not over cook the eggs or they will become rubbery. The muffins will continue to cook for sometime even when out of oven so keep that in mind. Mine took 7 mins to bake and then 5 more minutes to cool down. I prefer the yolk on the soft side than over cooked.
  • Once the muffins have cooled down, gently take them out by running a small knife around the cups. Serve immediately with tea/coffee/juice.

Storage:

You can make these muffins in batches and freeze them for later use. Let the muffins cool down completely and then wrap them and freeze in a zip-lock bag or a freezer bag. For reheating wrap in a paper towel and reheat in microwave.

Butter Cookies

DSC_0298

All those who know me or read my blog will know how much I love to bake. There is no better mood-booster than beating up a dough and baking it till perfection. So when my husband got a $50 gift coupon from Sears beginning of this year, I knew instantly how to put it to good use. Thereby came home an electric mixer and a food processor. And thus my effortless entry into the world of baking.

More than savoring the home-baked goodies, I like the process of preparing it; taking out my measuring cups, scooping out the flour, kneading the dough with my hands, sprinkling flour, the wonderful aroma – everything is like a therapy for me.

DSC_0285

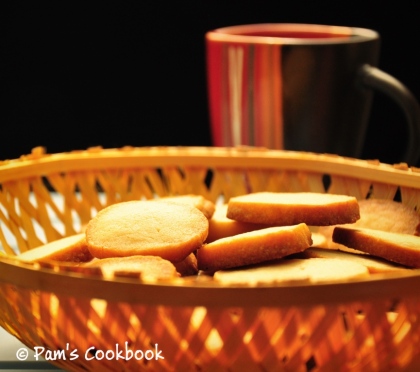
Last winter was terrible. With 3-4 inches of snow piled outside there was no way I wanted to go outside to buy those blue boxes of Danish butter cookies; so when the craving set in, out came my bakers hat and I inaugurated my hand mixer with this butter cookie recipe from here while BBC helped me in clicking some of the pics. Since that winter morning I never got around to upload this post and was looking for a special occasion to do so.

Now as I participate in the Bake Fest Event #21 hosted by AmritaVishal of Sweet ‘n’ Savory , I think it is a good timeBakeFest-200 to share this entry of Home Baked Butter Cookies with you all. And trust me, if you have a hand mixer you can do this in a jiffy!

DSC_0127

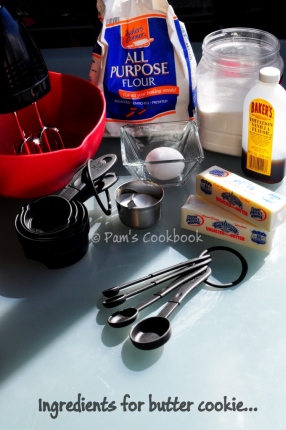
 Ingredients:

  • Butter, unsalted and softened – 1 cup or 8 oz
  • Granulated sugar – 3/4 cup
  • Salt – 1/4 tsp
  • Vanilla extract – 1 1/2 tsp
  • Egg yolk – 1 large
  • All-purpose flour – 2 cups

Method:

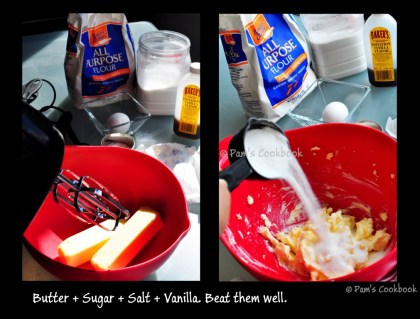
  • In a big bowl add the softened butter, sugar, salt and vanilla and beat them together until smooth and creamy.

Butter Cookies

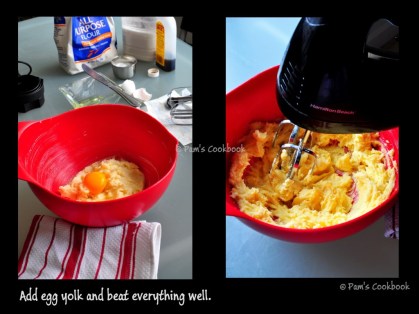
  • Add the egg yolk and beat in till everything is well incorporated, scraping down the sides of the bowl.

Butter Cookies1

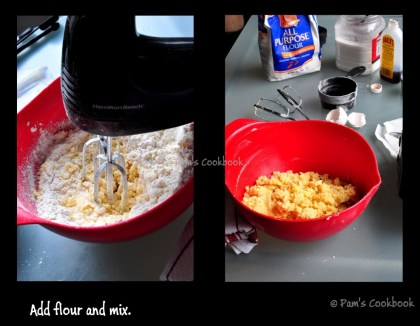
  • Add the flour and beat just until incorporated.

Butter Cookies2

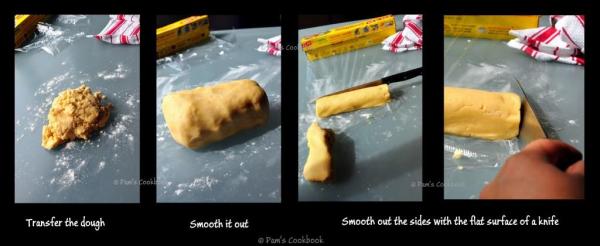
  • Sprinkle some flour onto a work surface and transfer the dough.
  • Knead it lightly just till the dough smooths out.
  • Divide the dough in half and shape each half into a log (round or square) that is about 1 1/2 inches in diameter.
  • Using the flat surface of the knife smooth out the sides so that you have sharp edges.

Butter Cookies-001

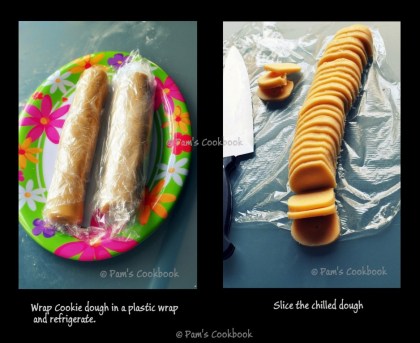
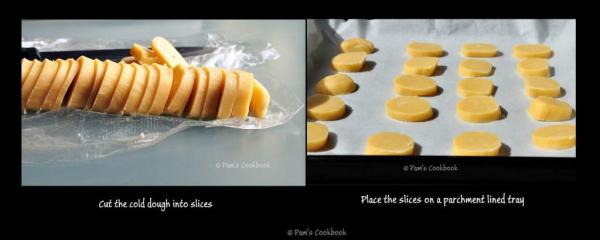
  • Wrap each log in a plastic wrap and place in the refrigerator until firm (at least two hours or preferably overnight). Can also freeze the unbaked logs for up to two months.

Butter Cookies-002

  • Before baking, preheat the oven to 325°F. and line the baking sheets with a parchment paper.
  • Once the log is firm, with a sharp knife, slice the dough about 1/8 – 1/4 inch thick or as you want.
  • Place the slices on the lined baking sheet about 1 inch apart.

Butter Cookies-003

  • Sprinkle some finely chopped nuts like walnuts or almonds if you want to and press them onto the surface of the unbaked cookie.
  • Bake them for 12 – 15 mins or just until done.
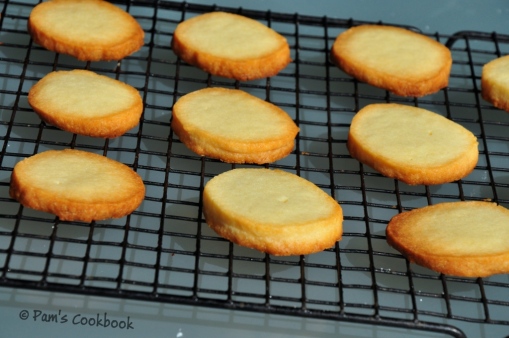
  • Once done remove from oven and place on a wire rack to cool.

DSC_0278

Note:

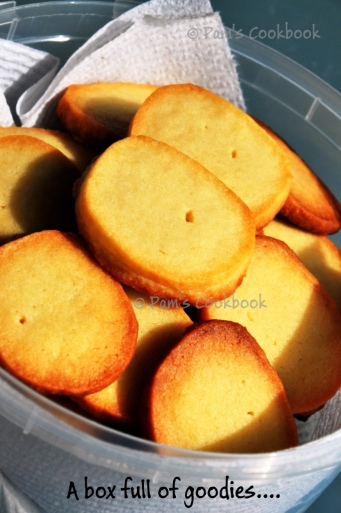
  • While shaping them into logs ensure that the dough is tightly packed or else you might get holes in the center. Some of my cookies got that, but not much so it was okay.
  • Baking time may vary from oven to oven. Remember that the cookies keep baking even after taking them out of the oven. So do not over bake and allow them to cool on a cooling rack completely; if they are still soft, you can put them back in the oven for a couple of  minutes again.
  • You can roll out the dough and cut them in various shapes using a cookie cutter.
  • You can decorate it using colored sugar or dip them half into chocolate.

DSC_0282

Sponge cake (with eggs)

Never did I celebrate a birthday till date without cutting a cake. My first birthday in US was a wonderful yummy chocolate cake from Stop & Shop. The very thought of all the thick chocolate on it makes me feel hungry even right now. Childhood was different… birthdays meant grand parties at home with all the school and neighbourhood friends.. balloons and birthday caps and home-made cakes. The house felt like a bakery shop then, smelling wonderful. My mom would start making cake in the old style oven, then cut it into various shapes.. sometimes it was a big mickey mouse or maybe just a round plain one. Then she would fill it up with cream and icing.. and after all the artistic touches, finally some gems and then use the icing nozzle to write my or my brother’s name on it. As I grew up, I started helping her too… the icing and artistic shapes were gone but the normal sponge cake remained. My best memories would be mixing the cake batter… I loved to scoop out some of the batter to lick.. it was yummy! Though everybody would make faces stating that it was not cooked and it’s not good for my stomach, but I just loved it. Me, my mom and bro would wait till midnight while dad slept till the cake was baked completely… and I still remember a night when we actually cut the cake at  midnight.

Those were the glorious old childhood days. These days it is so much easy to order a cake. but I do miss all the fun. As I started getting comfortable in the kitchen and with the oven, I decided to attempt to bake a cake. Again a quick call to mommy and it did not sound too difficult as well. So we got a baking tray and hurray within an hour or two I could smell the similar whiff of bakery in my house too… It was so nostalgic… thanks mommy…!

This is something that me and my husband love. Nothing better than this healthy home made sponge cake. Though we do get readymade cake mixture at the stores here, we both love the authentic way. Here it is for you all to give a shot!

Ingredients:

  • Eggs – 6
  • All purpose flour (Maida) – 3 cups
  • Sugar – 3 cups
  • White oil – 3 cups
  • Baking Powder – 3 tsp
  • Vanilla essence – 2tsp (adding too much might lead to a bitter taste)
  • Cherries or dry nuts – as per preference
  • Milk – 1/4th cup
  • Oven (I use the conventional oven available in US kitchen, so you may want to check the temperature for the kind of oven you possess.)

Method:

  • Add baking powder to the Maida and keep it aside.
  • In a bowl break all the eggs and beat it well till bubbles start appearing. Use a hand blender if available.
  • Gradually add the sugar in turns and keep whisking the mixture well.
  • Add the Maida and baking powder gradually in turns and keep beating so that there are no lumps.
  • Add oil, milk and vanilla in turns and blend it well.
  • Add dry nuts if you want to and mix it to the batter and garnish a few at the top.
  • Lightly grease the baking pan with cooking oil and sprinkle some flour on it so that the cake does not stick to the bottom of the pan.
  • Pour the batter into the pan, it would be 2 inches deep.
  • Preheat the oven and then bake the mixture at 350 F for 40-45 minutes. Check the readiness of the cake by poking it with a fork or toothpick. The cake is ready if it comes out clean (Since ovens vary, you can bake it for a couple of minutes more or less).
  • Remove the pan from the oven and let it cool for 5 – 10 minutes.
  • Once it had cooled off use a knife gently on the edges of the cake to unmould it from the tray and flip it on to a fresh plate or tray.

Important Note:

  • A cake with 3 eggs can be baked easily on a 9 inch by 9 inch baking tray, that is what I generally use. However I am mentioning the measurements for 6 eggs which will need a larger baking tray.
  • You may use color as well as per preference though it is optional. You can also use coco powder to get a chocolate color. I sometimes keep half the batter as it is and in the other half add 1-1.5 tsp coco powder (adding too much might lead to a bitter taste) and then put the batter in 2 layers in the baking tray. This gives me a bicolored or a choco-vanilla cake. You can experiment with colors, but always remember that using coco powder might lead to the cake getting burnt at the bottom so the layer with coco powder should always be on the top.
  • The batter should be well beaten, only then will you get the perfect (unbelievably soft) sponge cake. I usually beat it with my hand but you may use a blender if available.

Do not forget to inhale the scent of the cake while it is baking. Trust me its heavenly!